Hey Everyone! 👋 ,
This article explains context API, how to use them and when to use them. To understand this article, you might need a basic understanding of React and React hooks .
Introduction
In a typical React application, data is passed down as props from parent to child components. This means that any state to be accessed by the children has to be placed in the parent component. These states can then be passed down many levels deep (depending on size of the application) until they finally get to the component that really needs them.
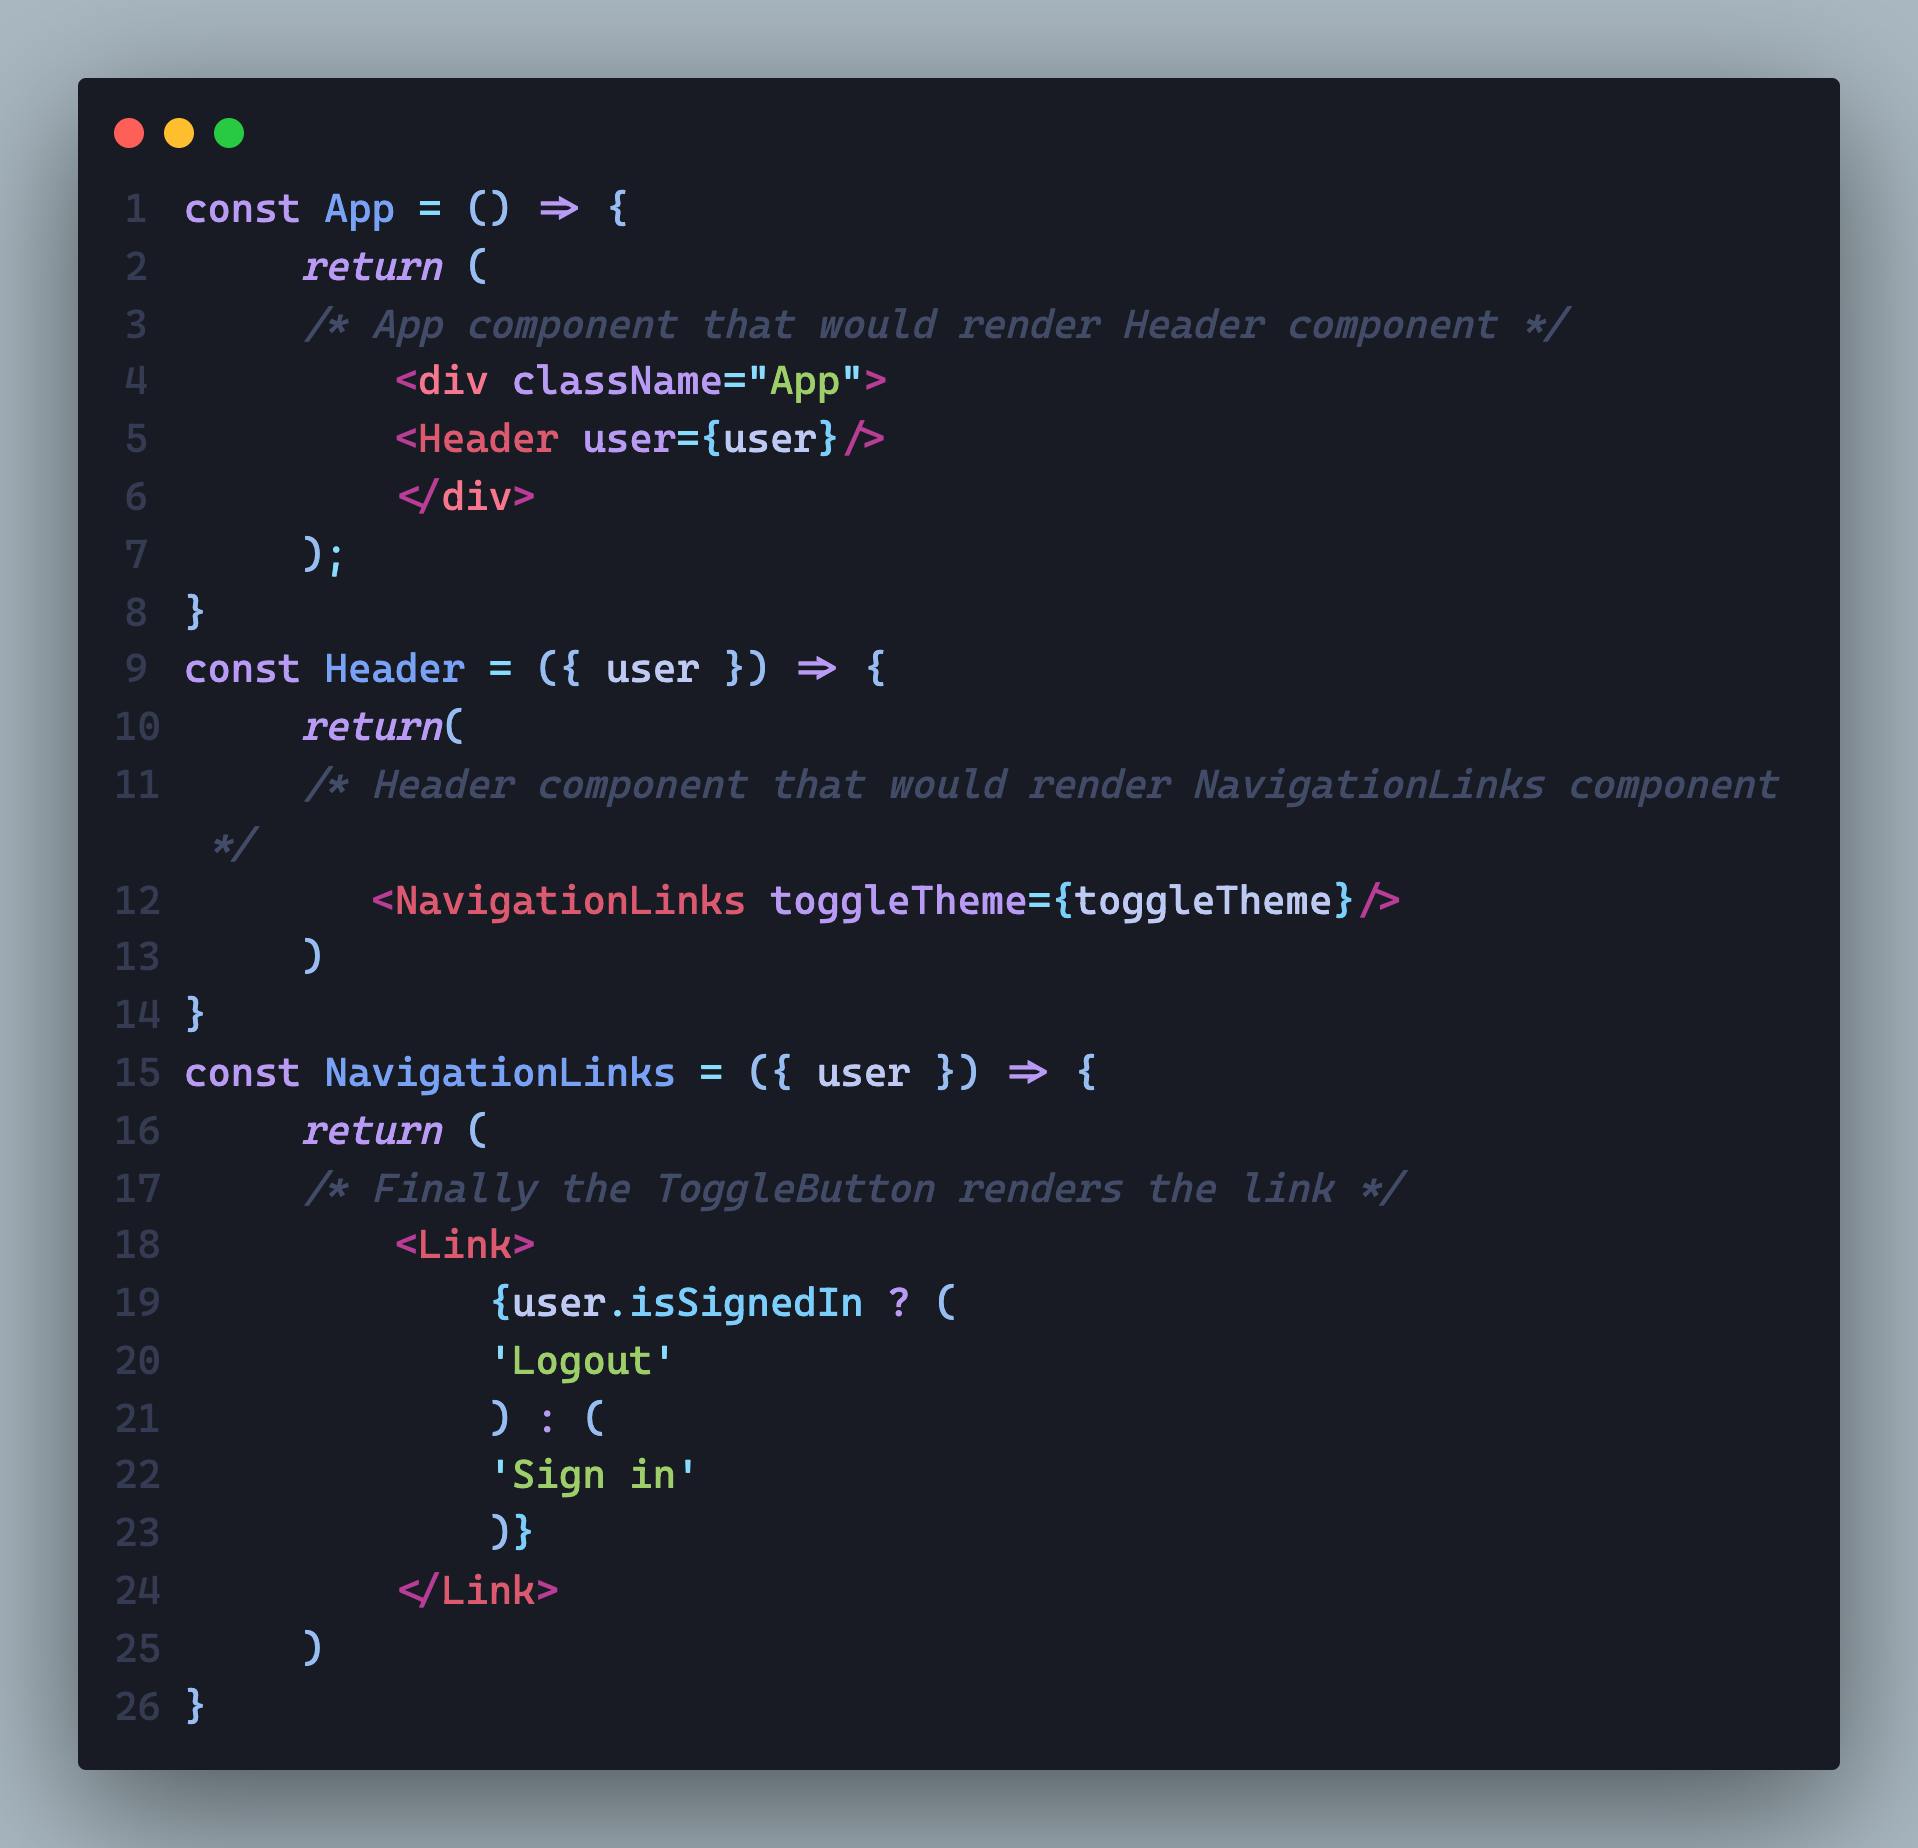
In cases like this, the Header might not necessarily need the user prop but has to pass it through because it contains a child component that needs it. In smaller applications, you can afford to allow this as it wouldn't really affect much in terms of code complexity - you can opt for the use of Component composition instead; where the component itself that needs the props is passed down, thereby giving the intermediate components no need to know what props is being passed.
But on the other hand when you have a large code base and have many components relying on a global state with props flying all around the app both through components that need them and those that do not. You could imagine how messy and complicated that would look.
This is where Context comes in - passing global state that would be required by most components but at the same time, avoiding passing them through intermediate elements.
When to Use Context
Although Context is said to reduce the trickling down of props from parent to child components through intermediate elements that might not need them, it might not always be the option to take; as using it makes component reuse difficult. So before you think of using context, you are sure that many components at different nesting levels rely on the data (e.g theme) i.e the data is global.
Context API
The Context API comes with some set of methods and components such as createContext, Context.Provider, Context.Consumer, contextType e.t.c
Notes:
For the sake of this article, both Class and functional components would be used to demonstrate various ways of consuming different contexts.
The context we are going to be creating would be for this article would be a
ThemeContext.
I've created a starter app for this article using create-react-app. This app just has a header and nav bar that would contain links to two pages (home and about). The live link can be accessed here and the github repo, here.
home page

about page

Let's get started. Shall we?

createContext or React.createContext
Whenever we use createContext() or React.createContext(), a Context object is created; and this helps any React component created to read the current value of the Context from it's nearest Provider upwards the component tree. An example of this would be:

Context.Provider
For every Context object created , there is a React Provider component also available that gives consuming components the ability to subscribe to Context changes.

As seen above, the Provider component receives a value prop that would be available to all consumer components nested under it. Based on what was said earlier concerning the consuming components taking the value of the closest Provider to them, we can decide to override values of different Providers by nesting them.
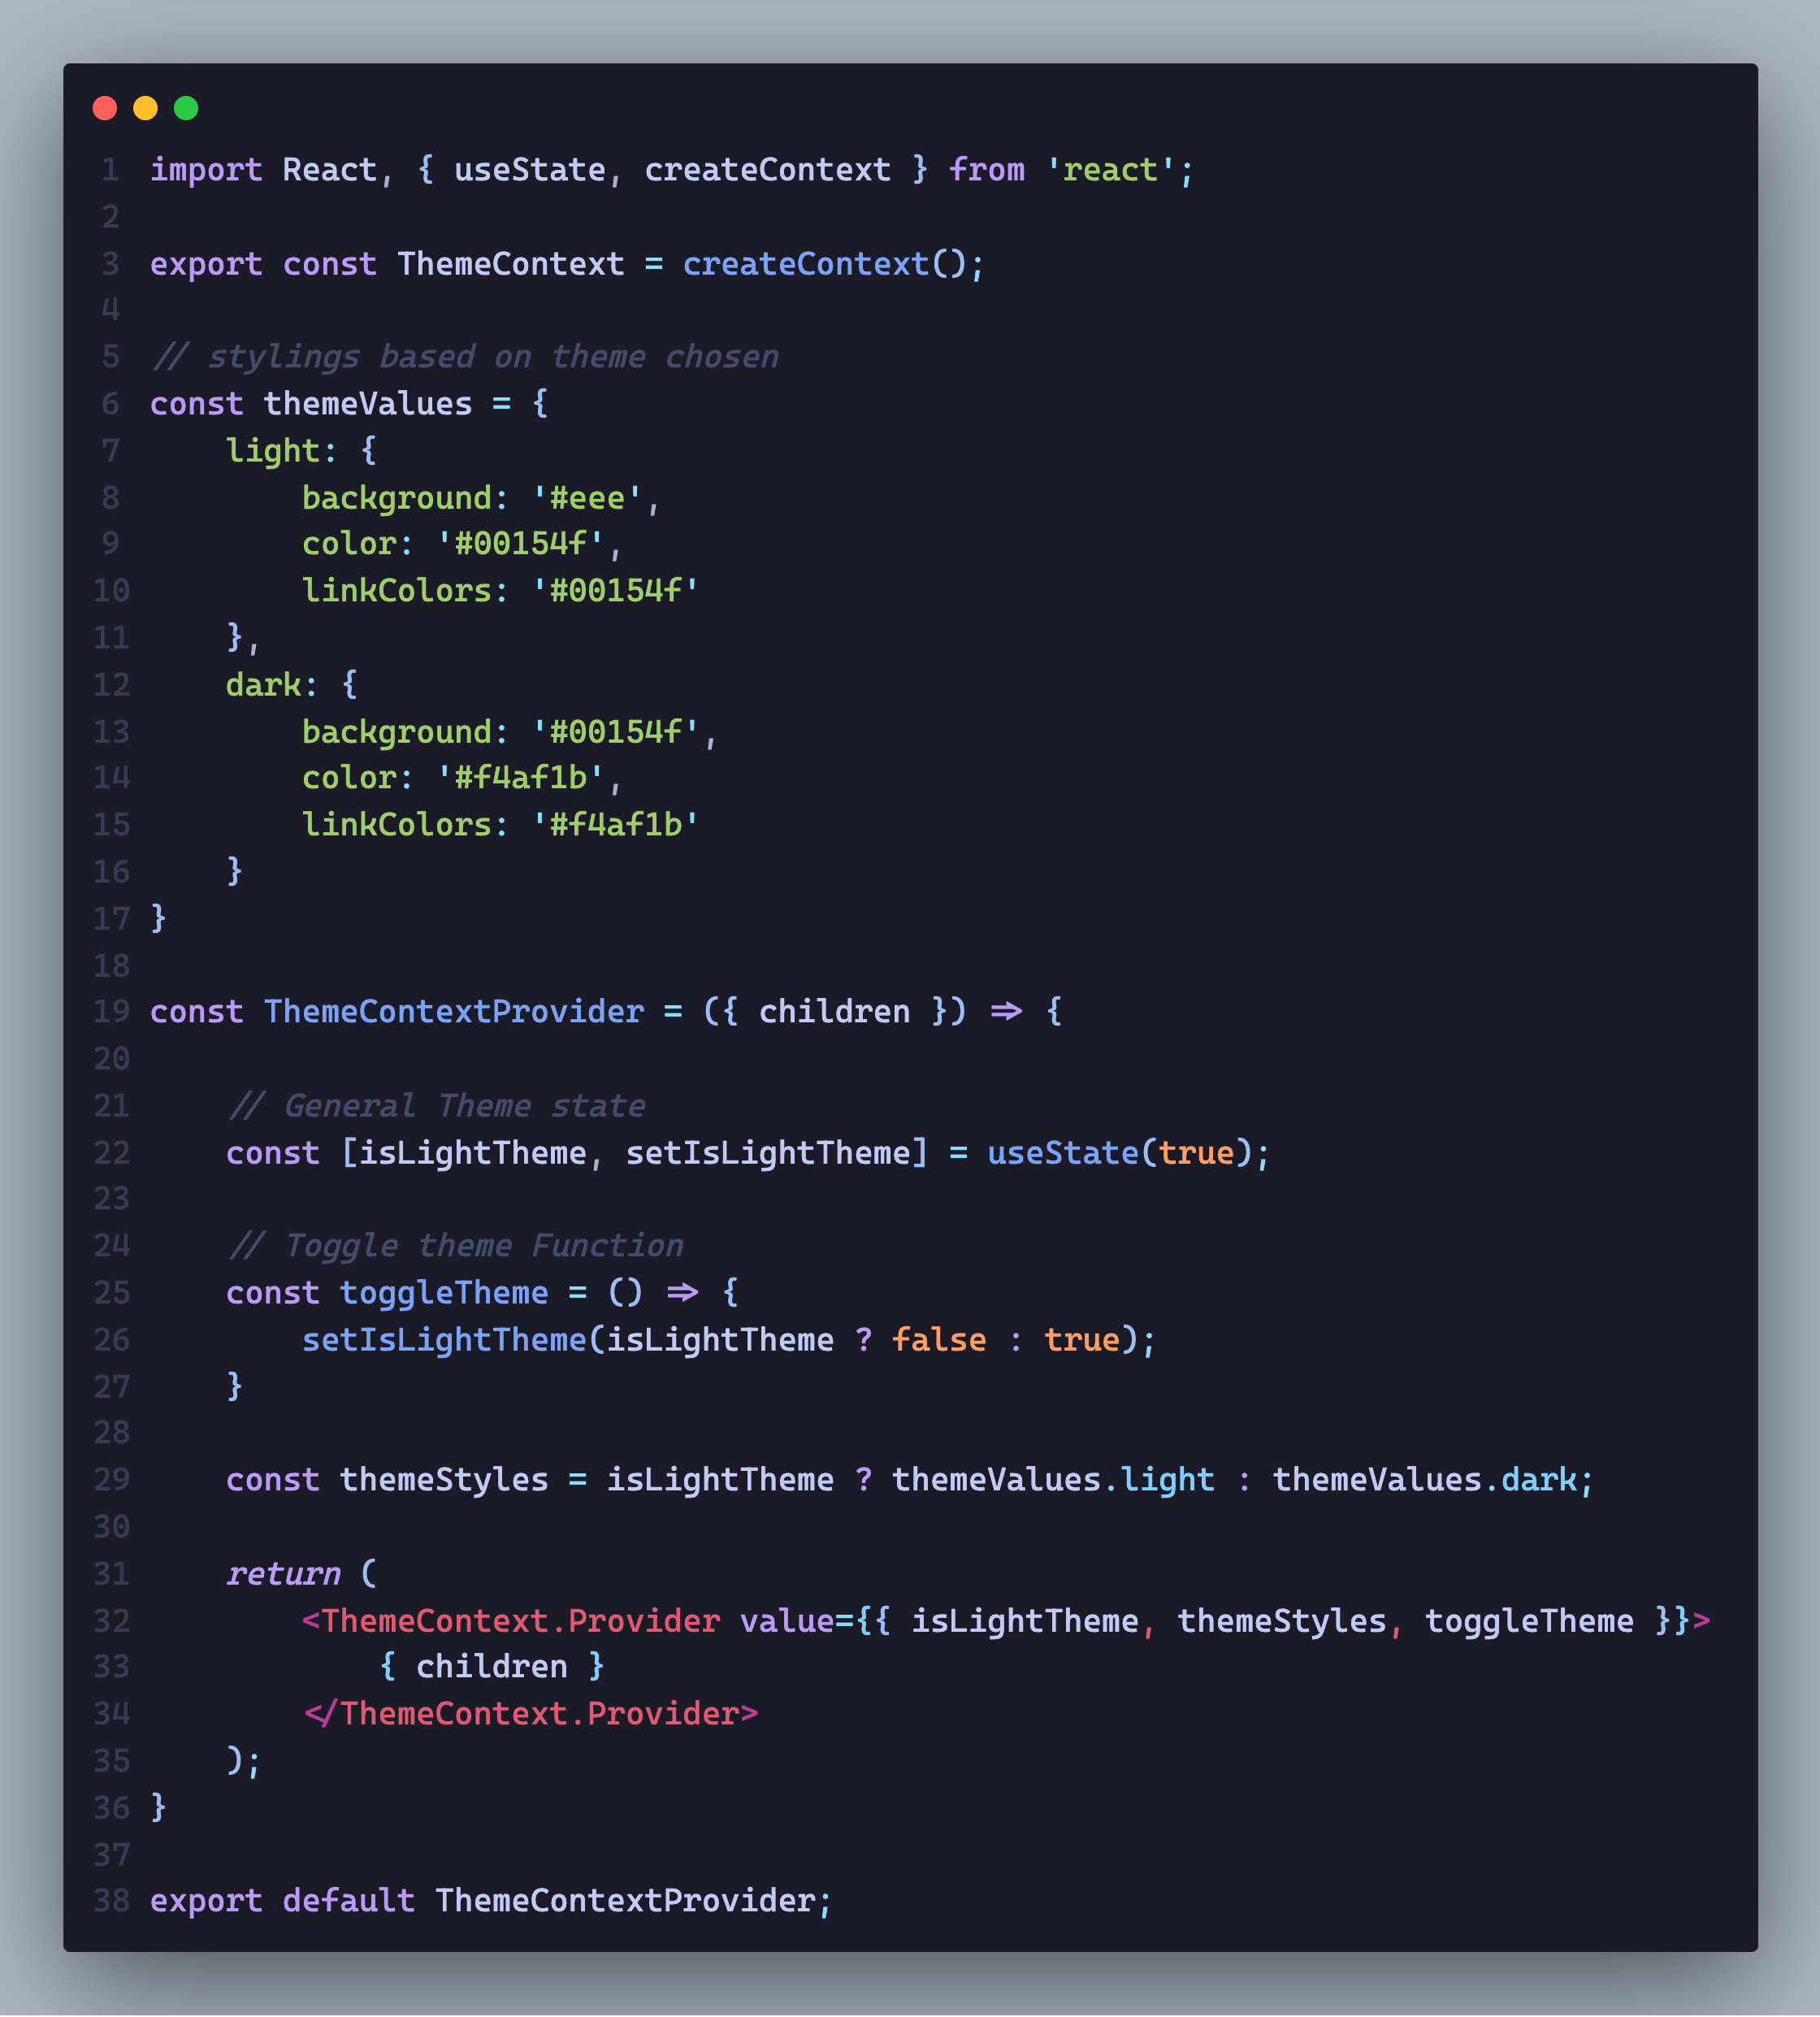
Using what we've learnt so far, we can go ahead to create our own ThemeContext for our app. We are deciding to keep the context created in a file of it's own (ThemeContextProvider.js) so that it would be easy to differenciate.
ThemeContext.js
So we import React and destructure off the useState hook and createContext method from 'react'. Then our Context object is made available to us using createContext. We then have various styles for the app background and text color depending on theme chosen. A ThemeContextProvider component with the default state of light theme, and function to toggle theme is then created which would pass it's children prop to the ThemeContext.Provider component. The value of the ThemeContext.Provider component would be an object containing the theme state, theme styles and the toggle theme function.
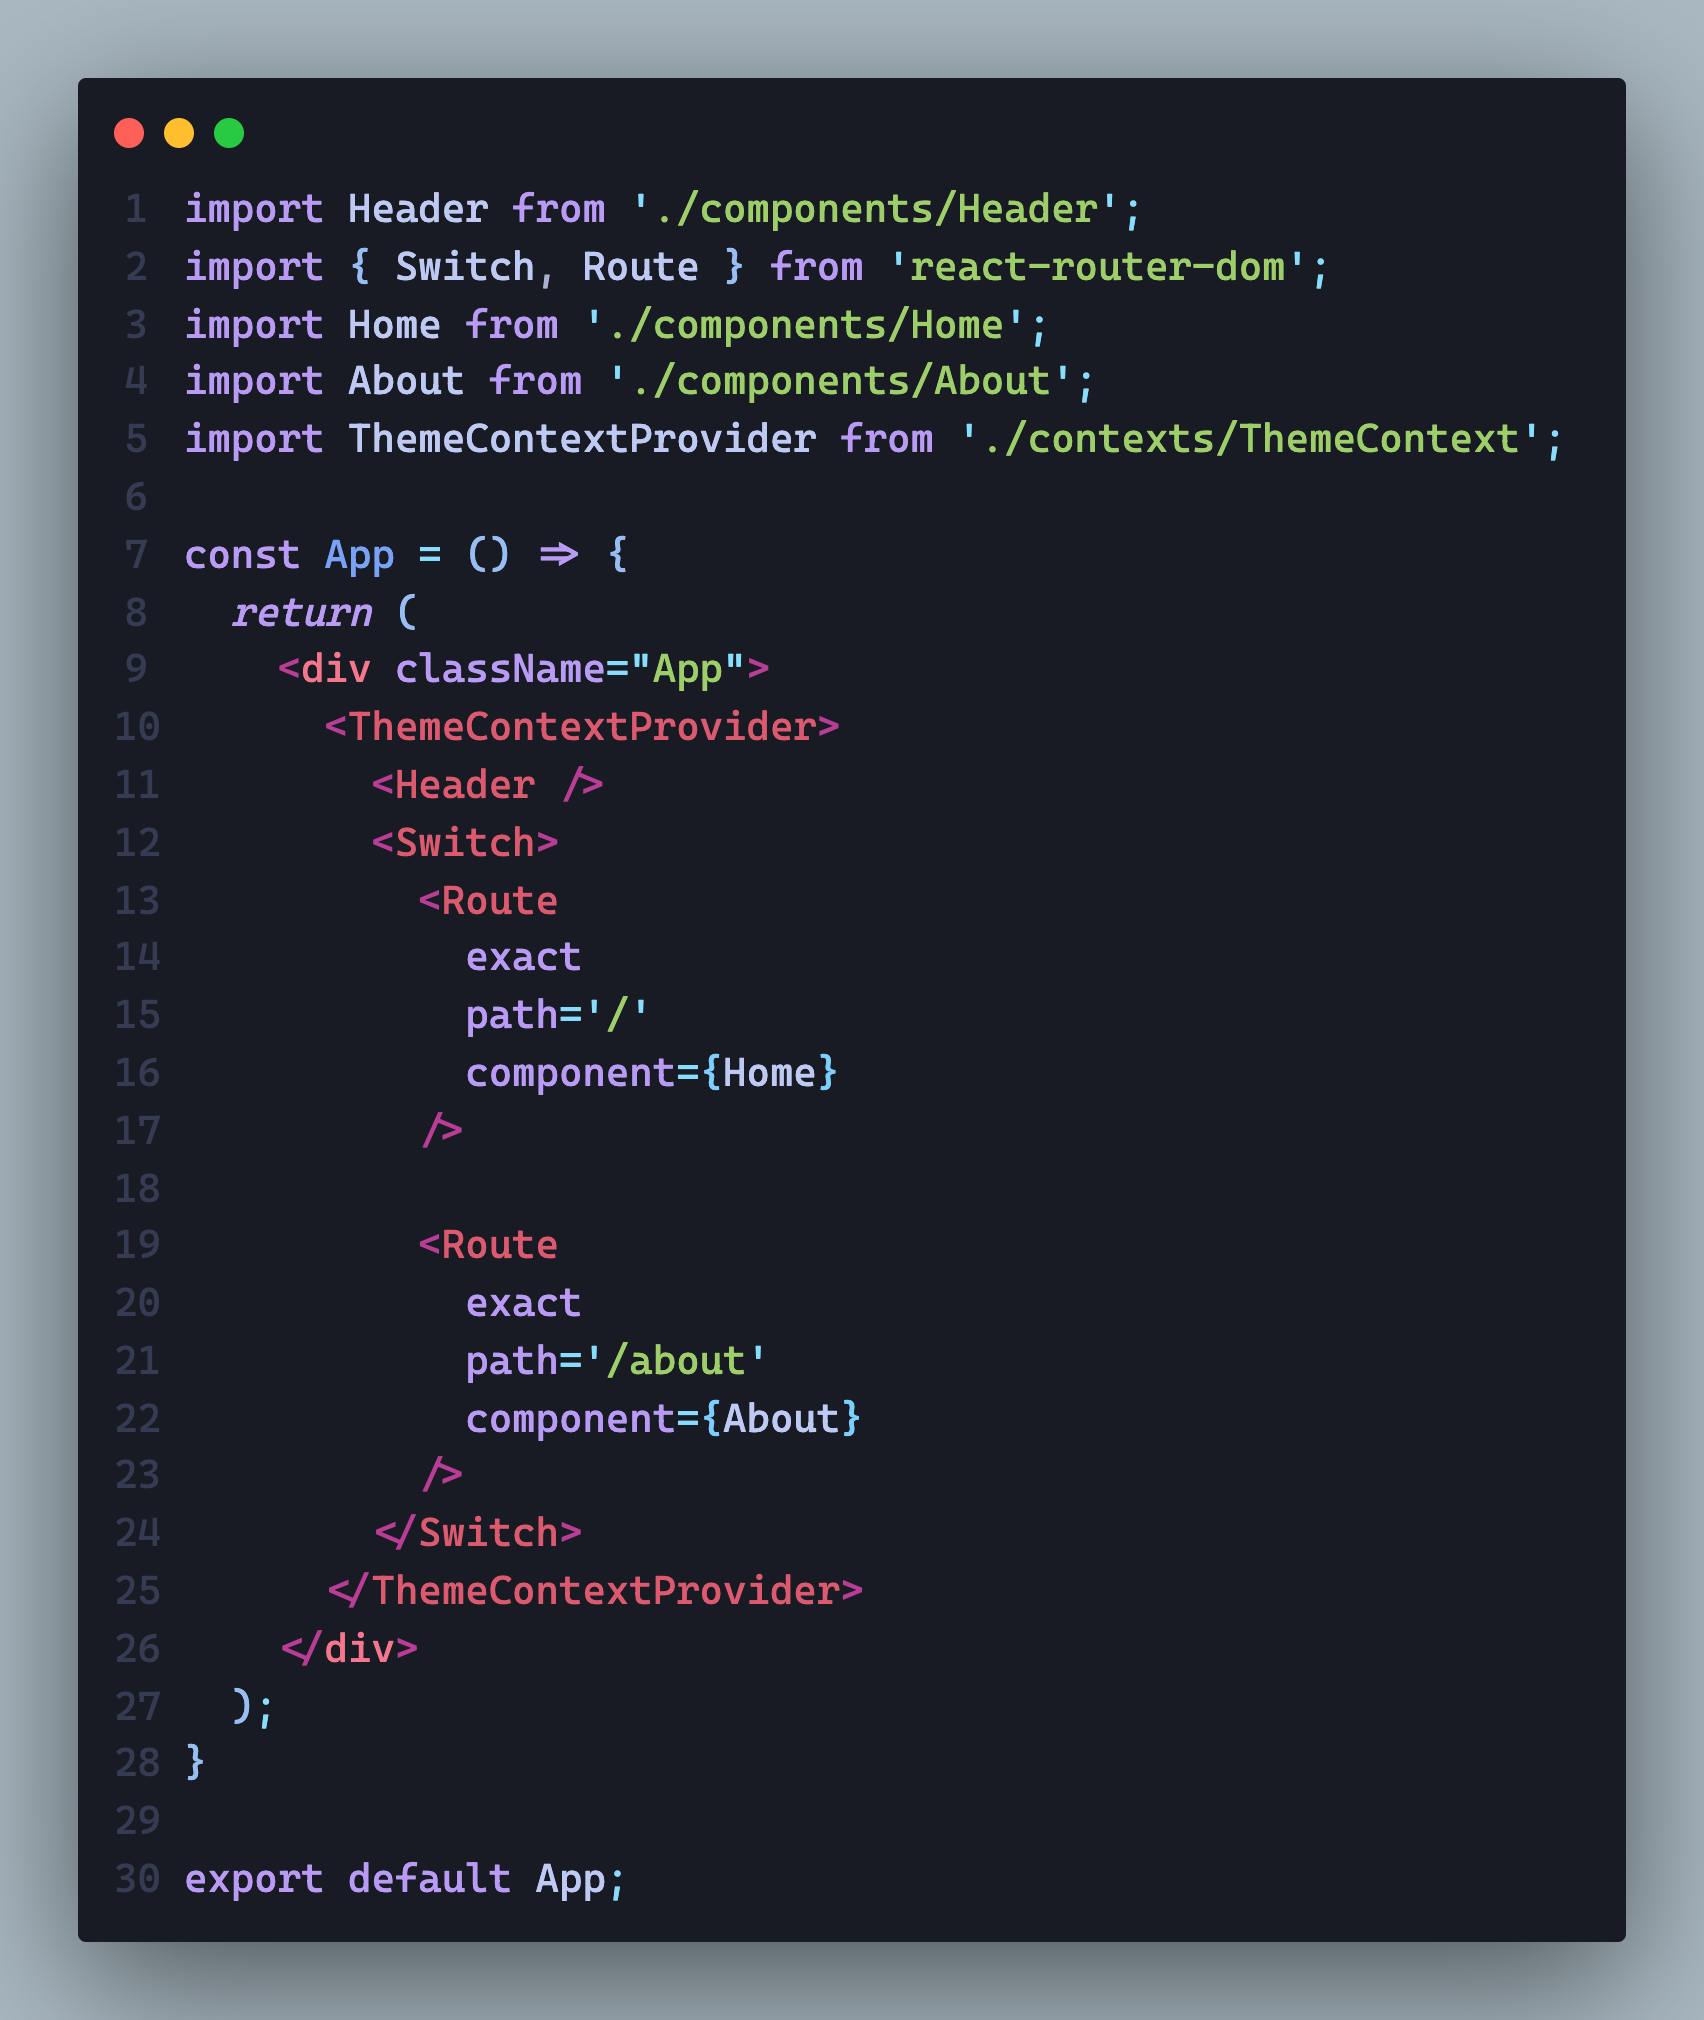
After creating this Provider component, we move on to exporting it to our App component in the App.js file and then nesting all other components/pages in need of it for consumption.
App.js
So now that we've set up the Context and gotten it ready for consumption through the Provider, let's see the different ways of consuming Contexts.
contextType
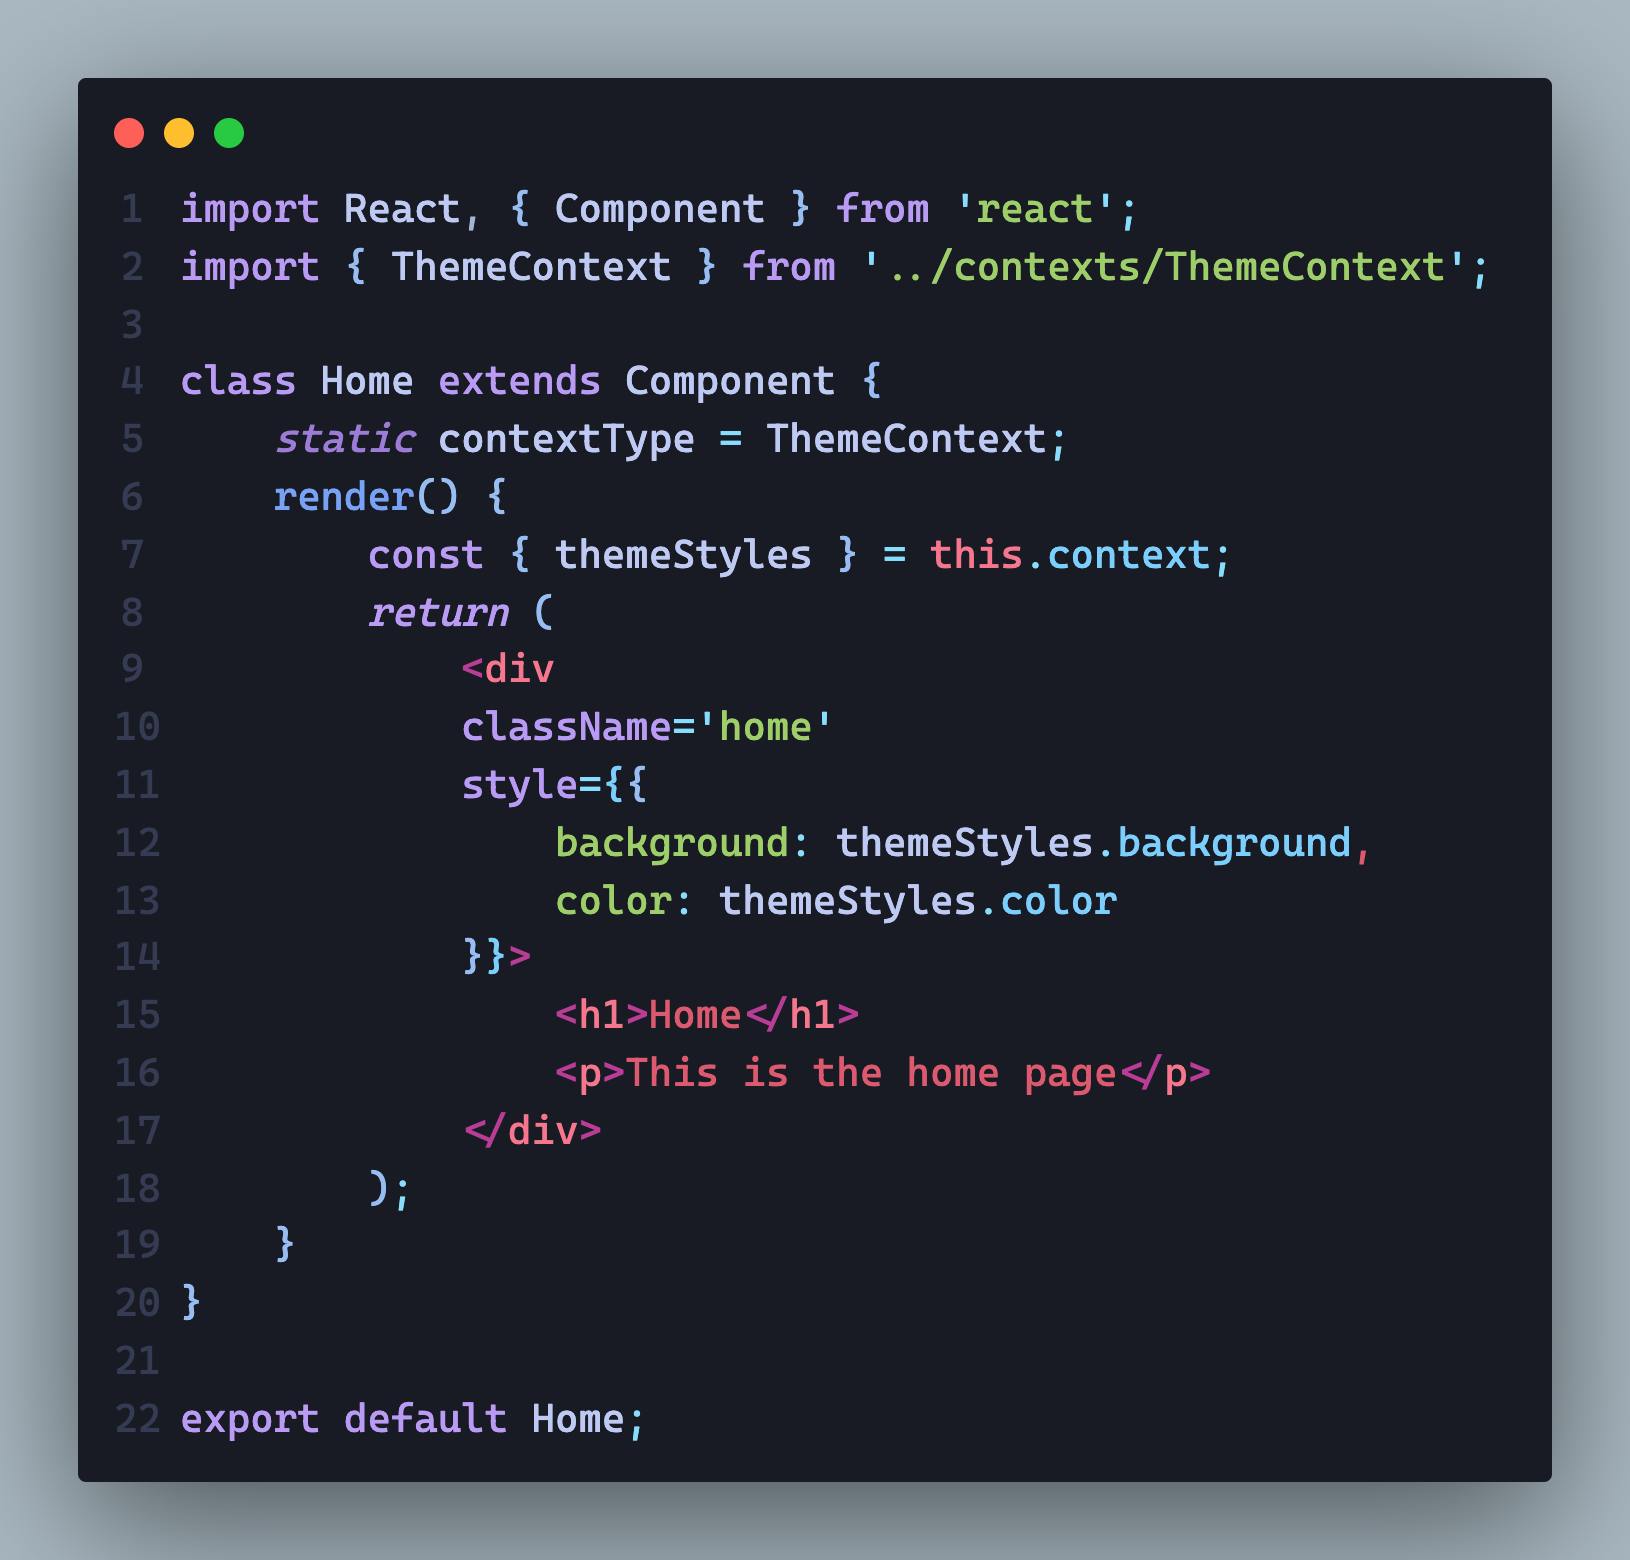
This method of consuming Contexts is used in class components alone. It entails the contextType property of a class being assigned to the object created with createContext(). The current value of the Context can be referenced using this.context. I have made our Home page in our app the class component to demonstrate this.
Home.js
We only need the theme styles from the Context object values in this case so we destructure only that from this.context and use the styles.
The downside of using
contextTypehowever, is that it does not give room for consuming multiple Contexts. i.e you can only consume a single context per class usingcontextType.
The remaining two methods give room for consuming multiple contexts and they are:
Context.Consumer
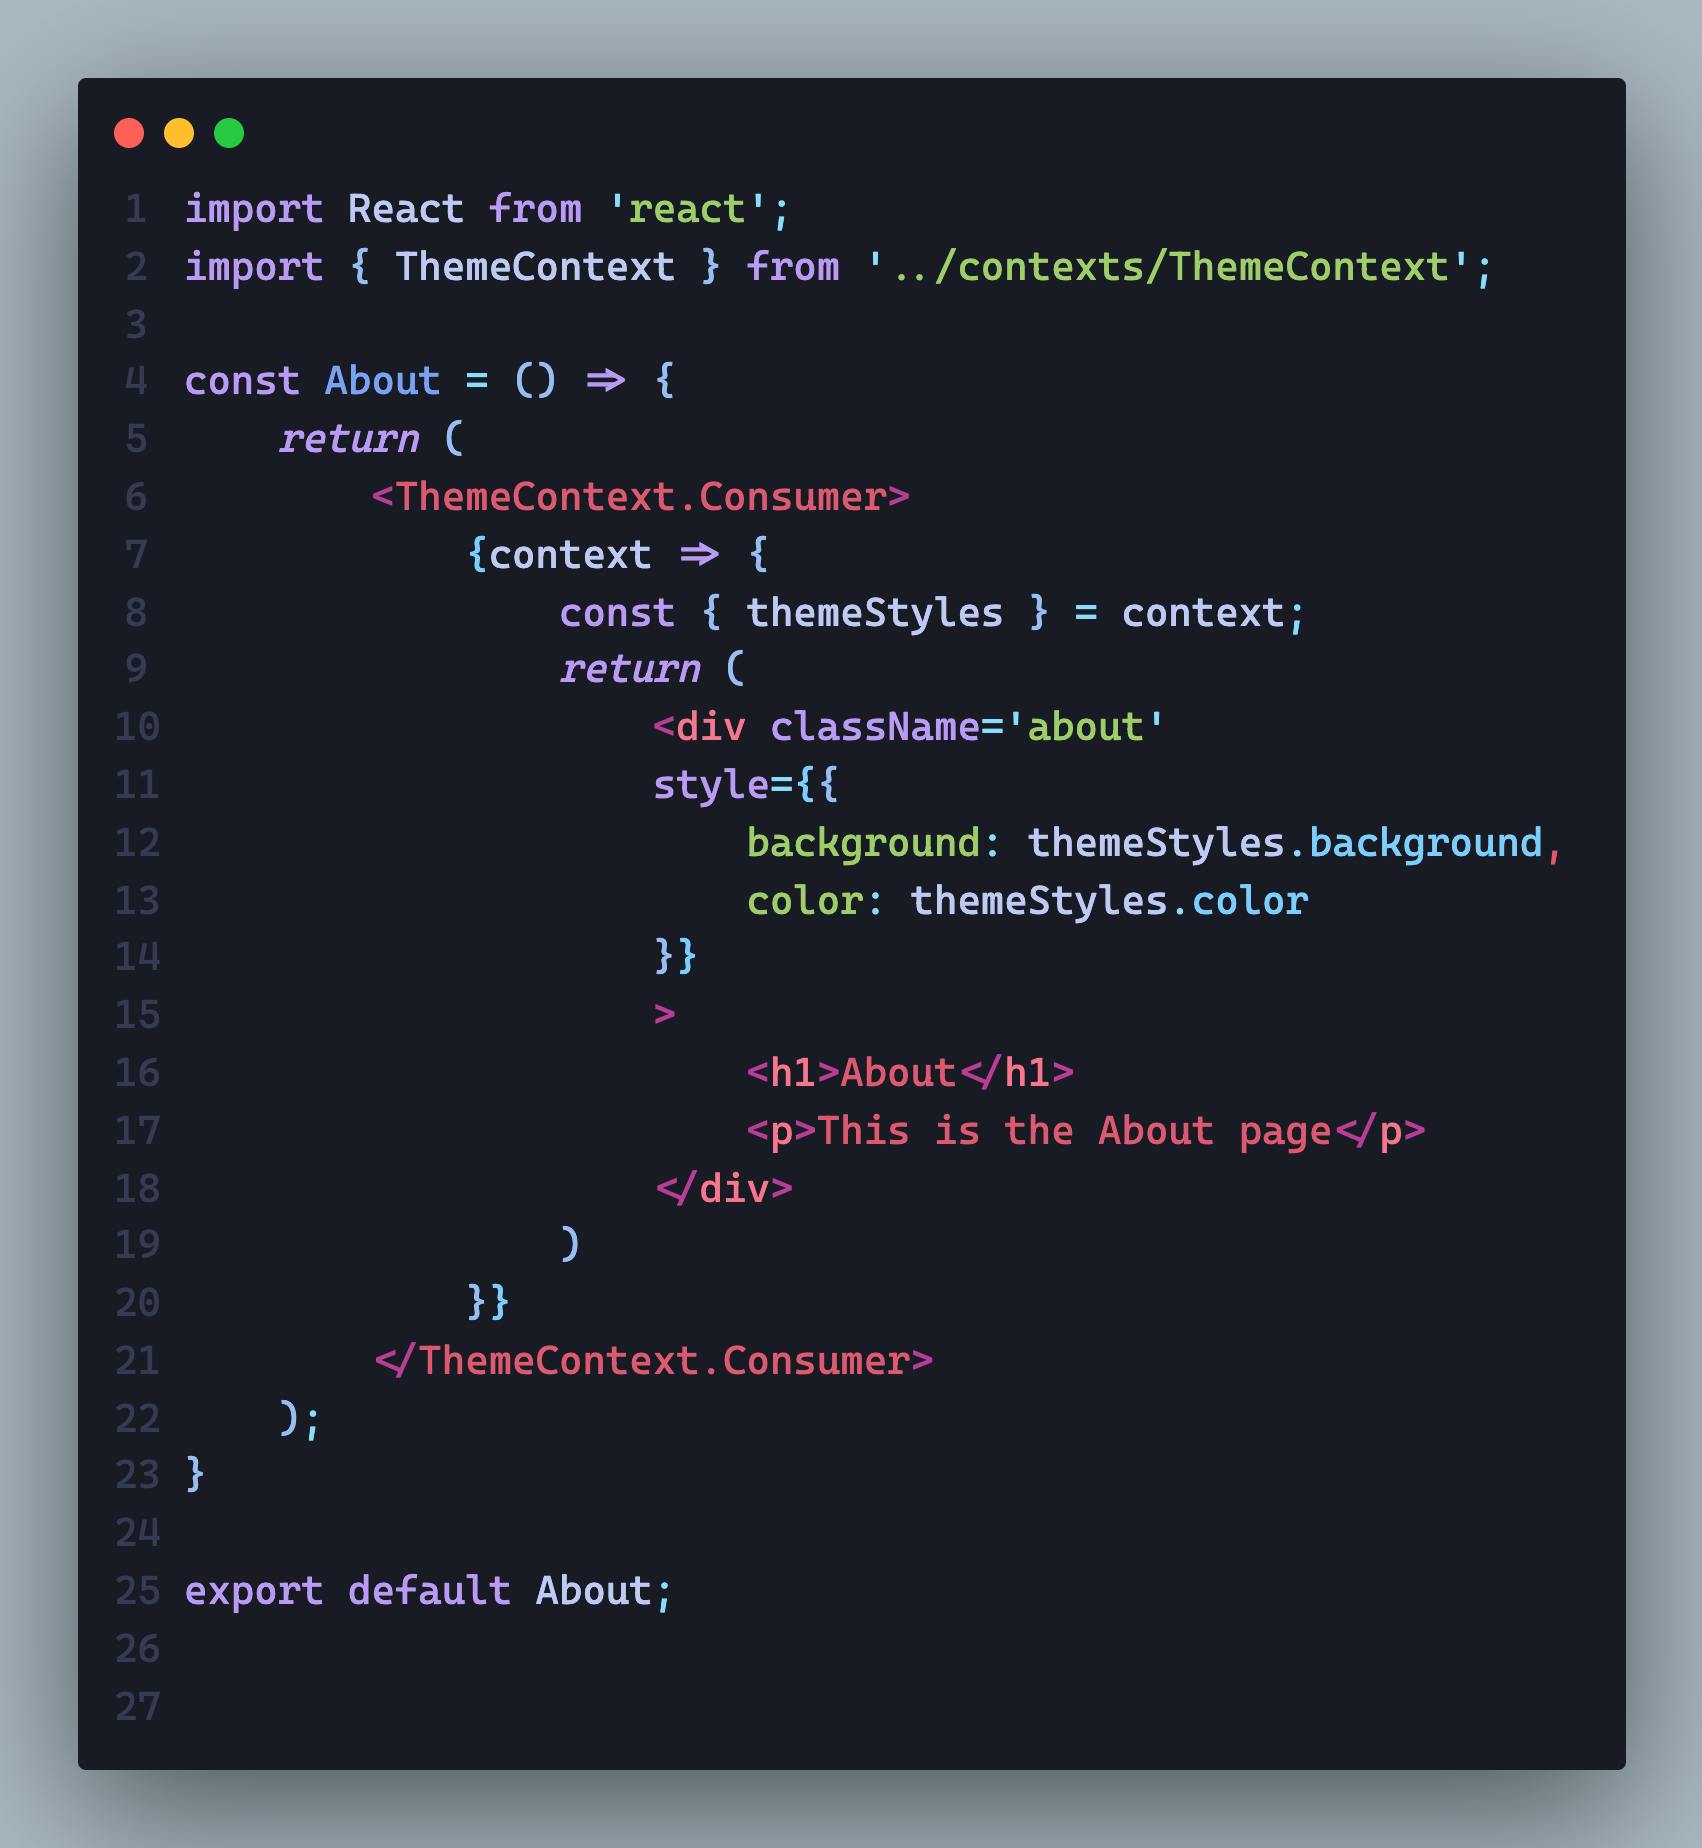
Just like Context.Provider, Context.Consumer is a React component created alongside the Context object and allows you subscribe to changes in Context within a functional components. This also allows a component to consume multiple Contexts. In our case, we have:

This Consumer component requires a function with a contextValue argument corresponding to value of the nearest Context Provider above it in the component tree. To demonstrate this part, we would be using the About page which is a functional component.
About.js
So in this case, we destructure off only the theme styles from the Context value because that's what we need for now. After we've done this, we have out Home and About pages looking like this:


useContext
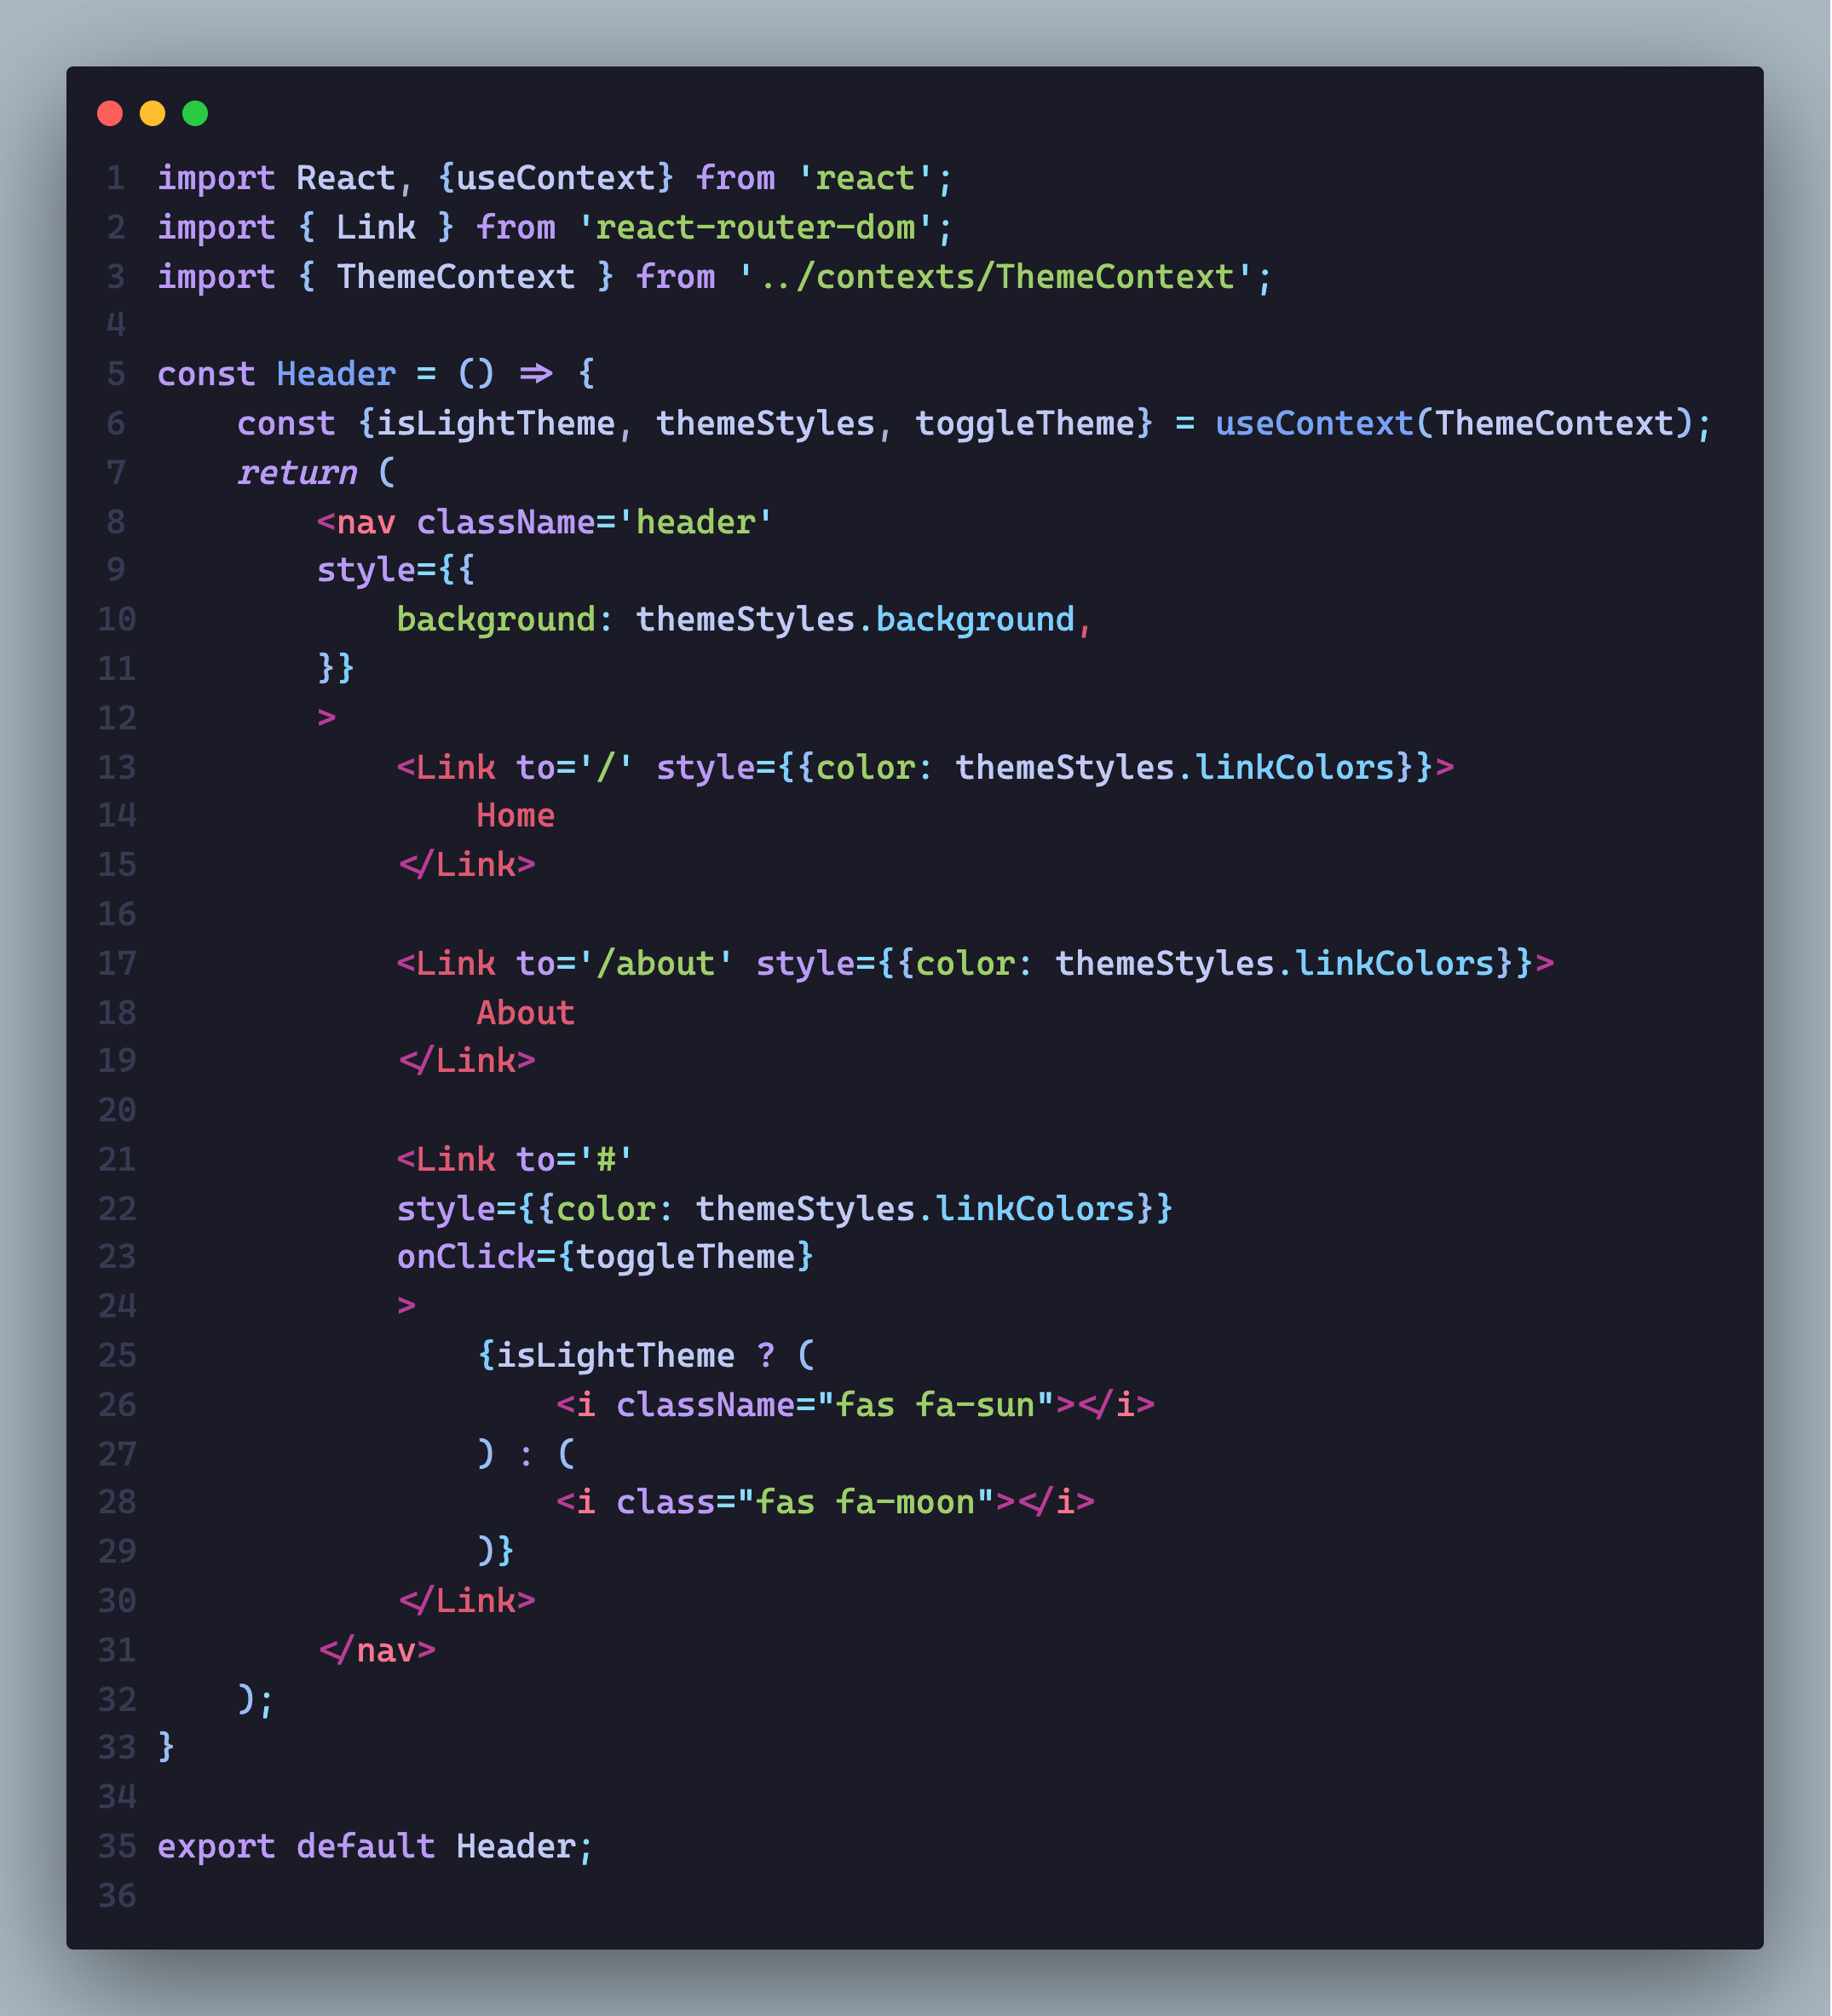
The final method used for consuming Contexts is the useContext() hook. This hook will receive the context to be consumed, and the value would correspond that of the nearest Provider for this context, upwards the component tree. The Header component in our app is yet to consume the ThemeContext, so let's use that to demonstrate.
Header.js
This is the component where we really need three of our Context values which we destructure from the useContext hook - the isLightTheme value is used to determine what icon would be rendered for the theme toggler; the themeStyles value is used for styling of the background for the header and also the nav links. Finally the toggleTheme function is passed to the onClick Event of the theme toggler.
Phew! that was a lot.

After all that, we have our app switching between light theme and dark theme with the help of our ThemeContext and theme toggler. The light theme and dark theme now look this:
light theme

dark theme

The updated app live link is here and repo here
Conclusion
At the end of this tutorial, we have seen the way to create Contexts and also various methods to consume them. We must however be mindful of how we use them, applying them sparingly only when we need to.
I must however add that context API causes all components to re-render upon update of context value or state as opposed to Redux that only re-renders the updated components.
If you would like to know the difference between context API and Redux and also when you should them. You can take a look at this article by Mark Erikson.
