

Update
This article was originally published using React's class-based components. But given the fact that functional-based components are now the norm, I would be providing the functional equivalent of the
Appcomponent with theuseStateReact hook. Enjoy!😊
Introduction
Building a To-do list application is a great way to challenge yourself to get going after grasping the fundamentals of React Js. It is a starter project that would help solidify basic concepts like State, Components, Virtual DOM, and what have you.
I would be walking you through the steps in creating a simple To-do application and would encourage you to build on it and add any features you may like. Before we get started, here are few things you must know:
- All functional components or functions apart from those provided by create-react-app, are going to be written as arrow functions.
- You need to know the basics of React to understand this article. (you could check out React Documentation .)
- This article does not involve deploying the to-do list app.
For those who would like to check out the real code, here’s the link to that. You could also access the live app here .
Update
The repo for the functional-components version of this app has been added to this article.
Since this is just a React tutorial, I am just going to drop the links to the CSS files for each component:
Setting Up the React App
For the sake of this example, we would be using the create-react-app method to set up our app. This is to make everything easy for us.
If you do not have create-react-app set up on your computer, you can get started by checking out Create React Documentation.
The following steps would get you started to set up your app:
1. Go to your terminal (if you are a MAC OS/LINUX user) or command prompt (if you are a Windows user).
Note: In this article, I would be using only the term ‘terminal’.
2. Change path to the directory you want to app to be created on, using the cd command:

3. Type create-react-app <name of the app> in your terminal and hit Enter. This installs and the app and Voila!! We can start coding our app.

Note: If you get an error message, try using the sudo command to switch to root.
4. Go into the app folder and open in VsCode or any IDE of your choice :

Sketch And Structure
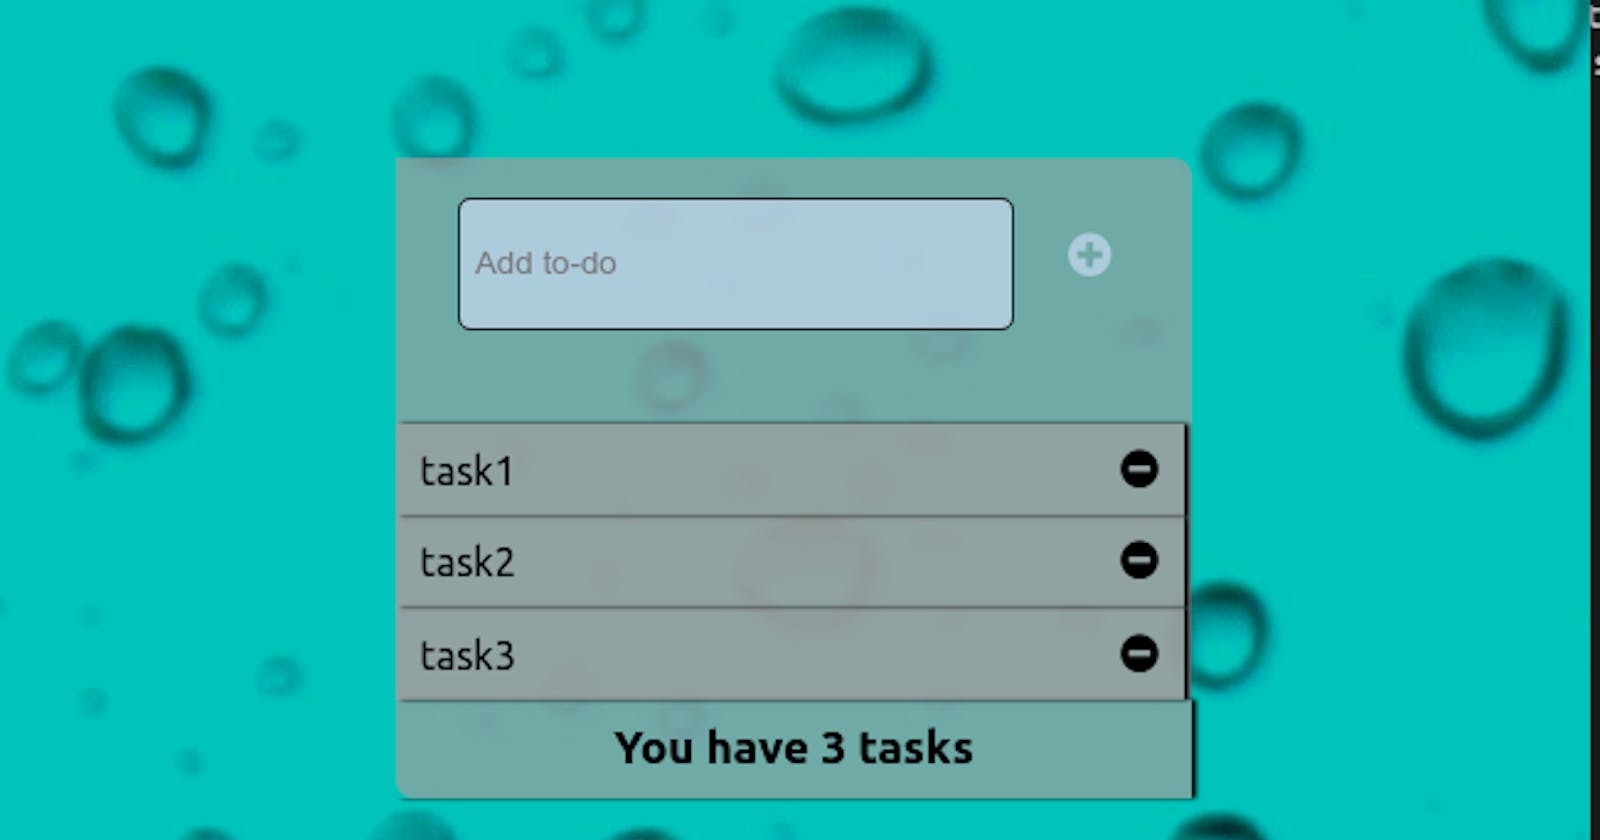
Before we dive into coding our app, we need to have a visual representation or structure of what we want to achieve. I have a quick sketch of how we want the app to look like :

Most especially in React, we want to know the following:
What our components would look like.
What part of the components should change or be updated.
When they would change.
Looking at the image, there are three basic components we would need to come up with:
- Input Form: This part takes care of receiving user input (task) which would eventually be rendered to the “to-do list” component.
- To-do List: This component serves as a container for each to-do (task) component and accommodates any new task accepted.
- Task Indicator: This component would display the number of tasks you have at that moment.
Just as these components have been set out, this is how they would look in our app. We would have to include a to-do component for each task and finally, our App.js file would contain all of these components (this is already provided to us by create-react-app.)
After the whole setup, we have our app’s src structure looking like this:
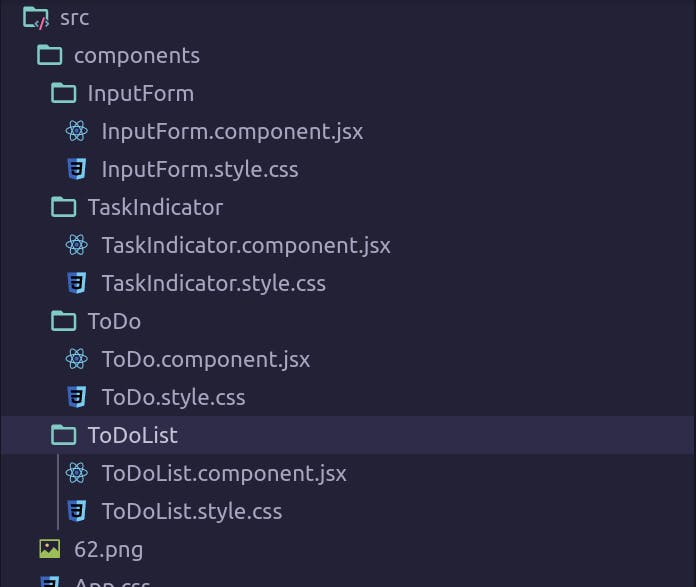
As you can see here, we created a component folder under the src folder, to house all individual and reusable components. This is one of the major advantages of React; it helps to break down our entire app into chunks (reusable components). We tend to see that advantage more when building larger applications.
Coding The App
Finally, it is time to code our app. Let us start with the App component with all our files in place since it would house all of our remaining components. This particular App component would be a class component so that we can have access to React's state.
I would recommend we clear the whole content inside our App.js file and start coding it from scratch. However, you could just modify it to the code below:
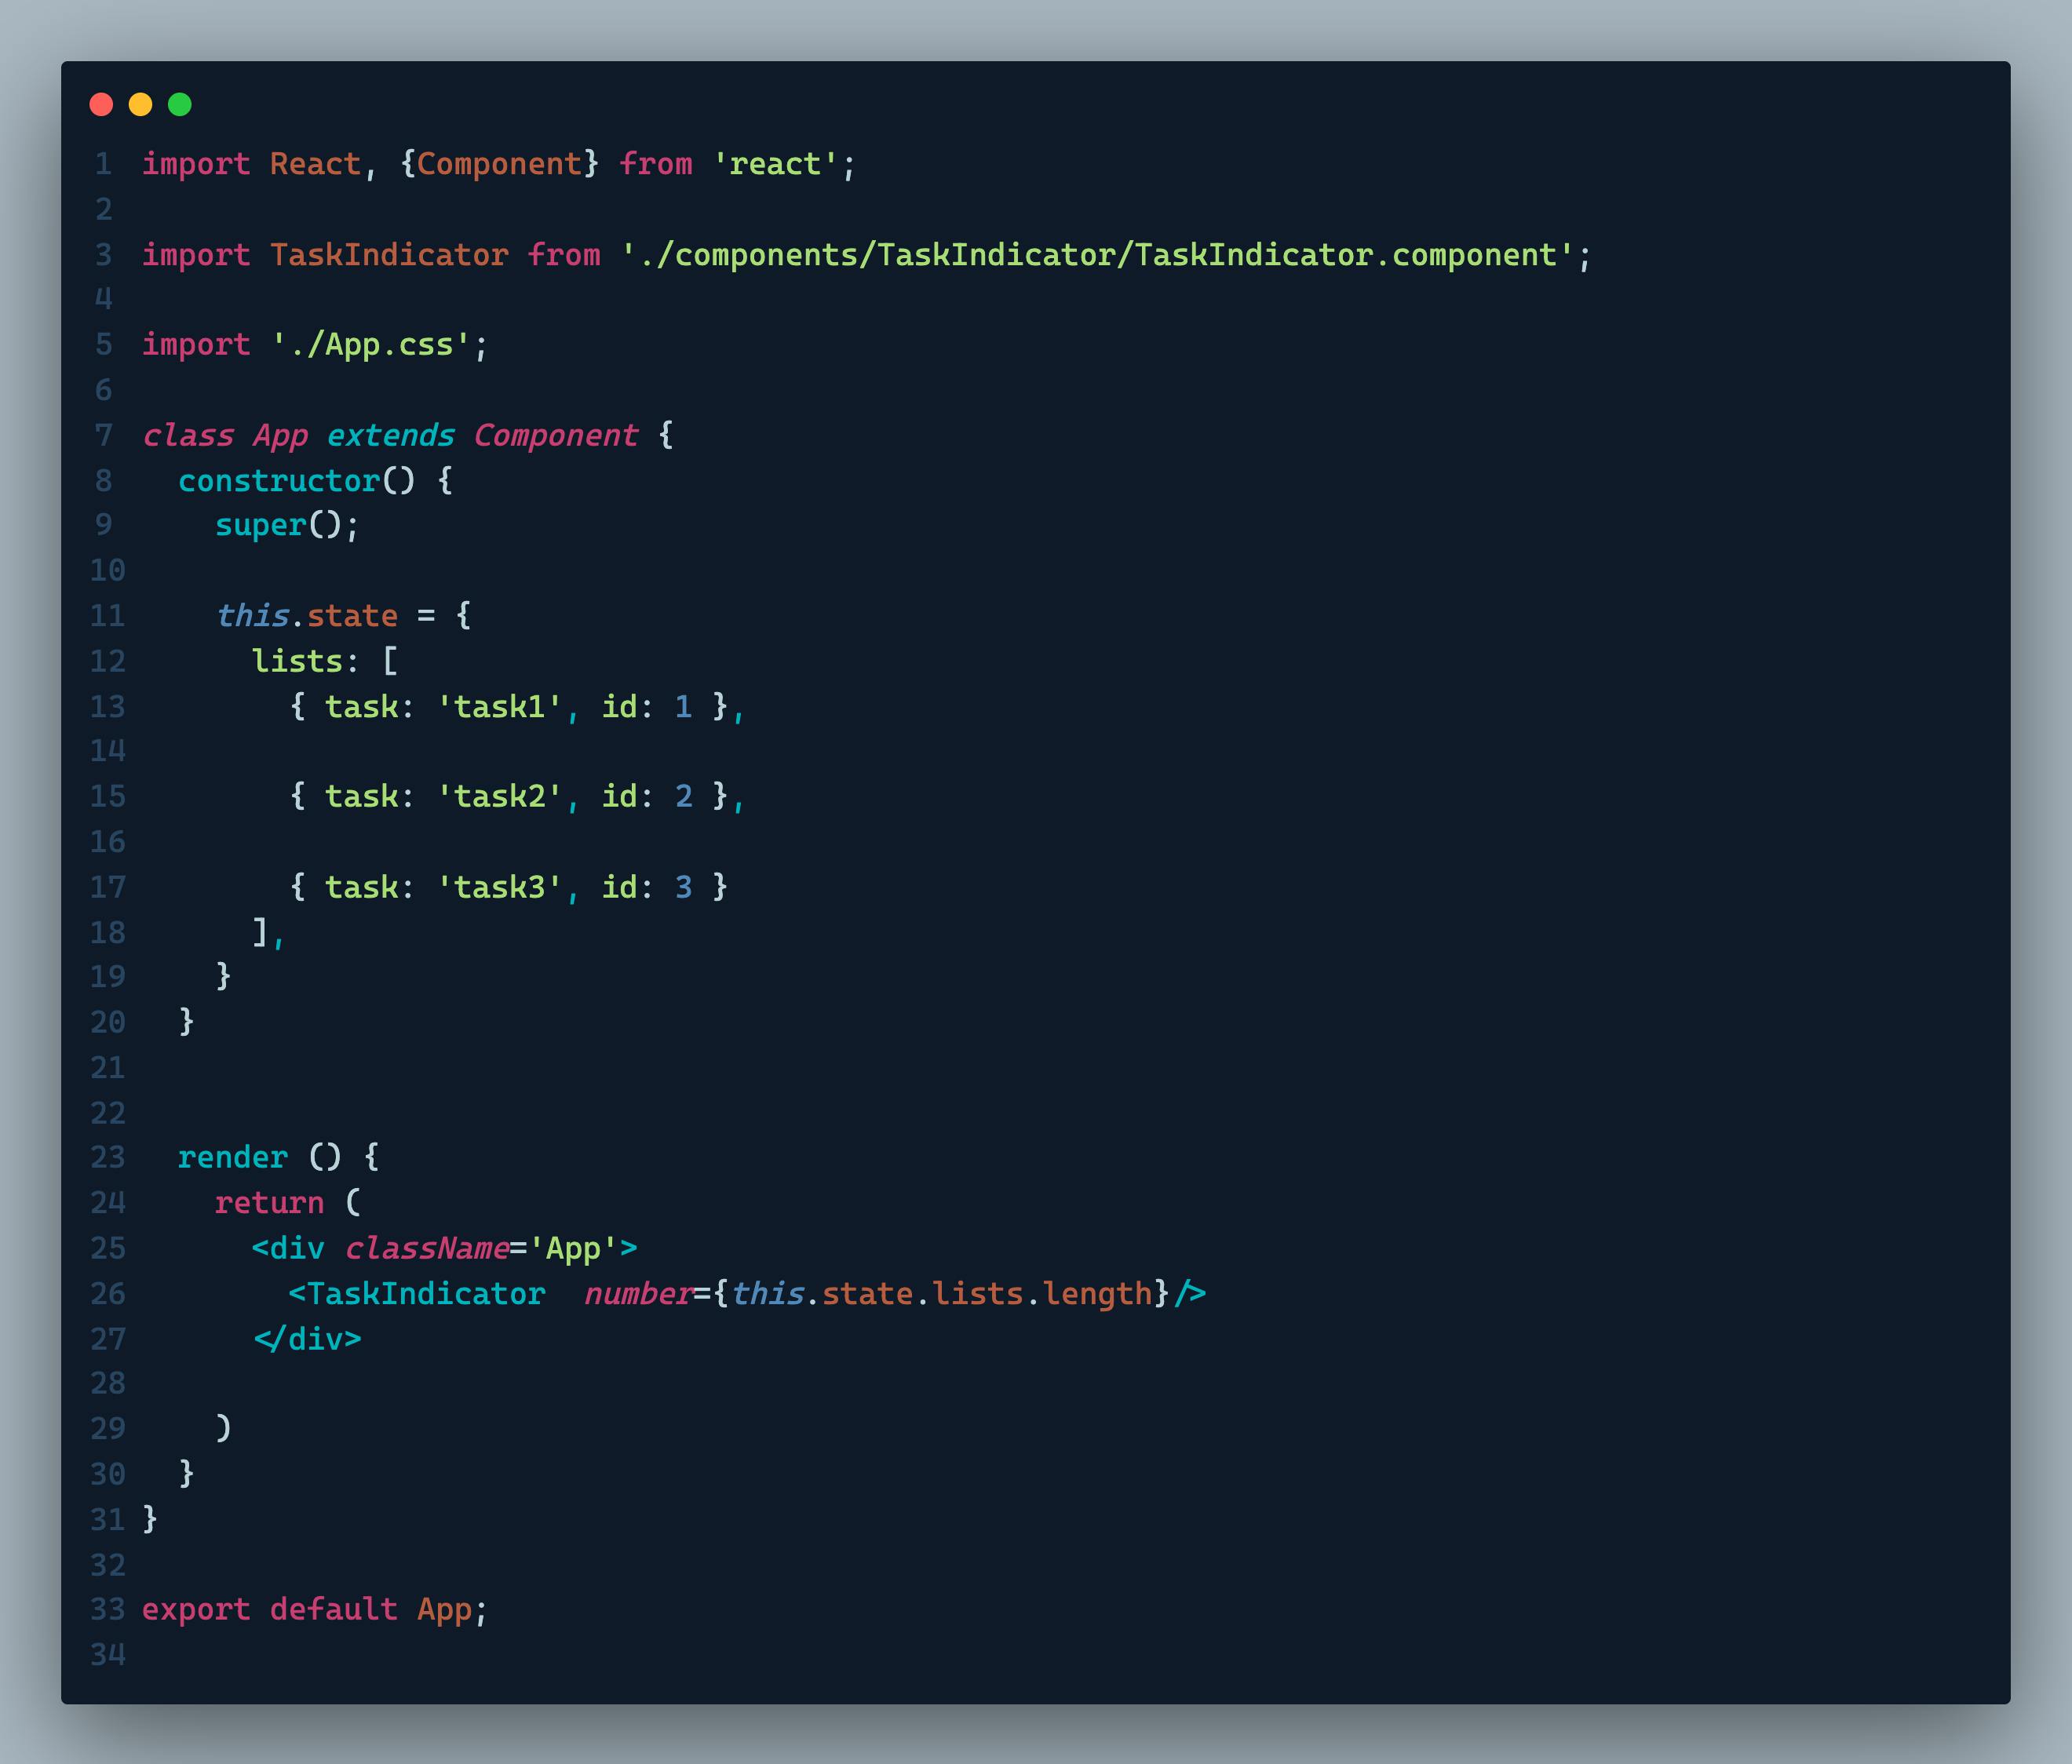
Okay let’s explain what we’ve done so far - The first part just describes what we have to import. As you know, before writing any functional or class component in React, we have to import React. Since this is a class component, we also have to import React’s component class as well.
We then import the TaskIndicator function from its respective file and also the CSS file for the App component.
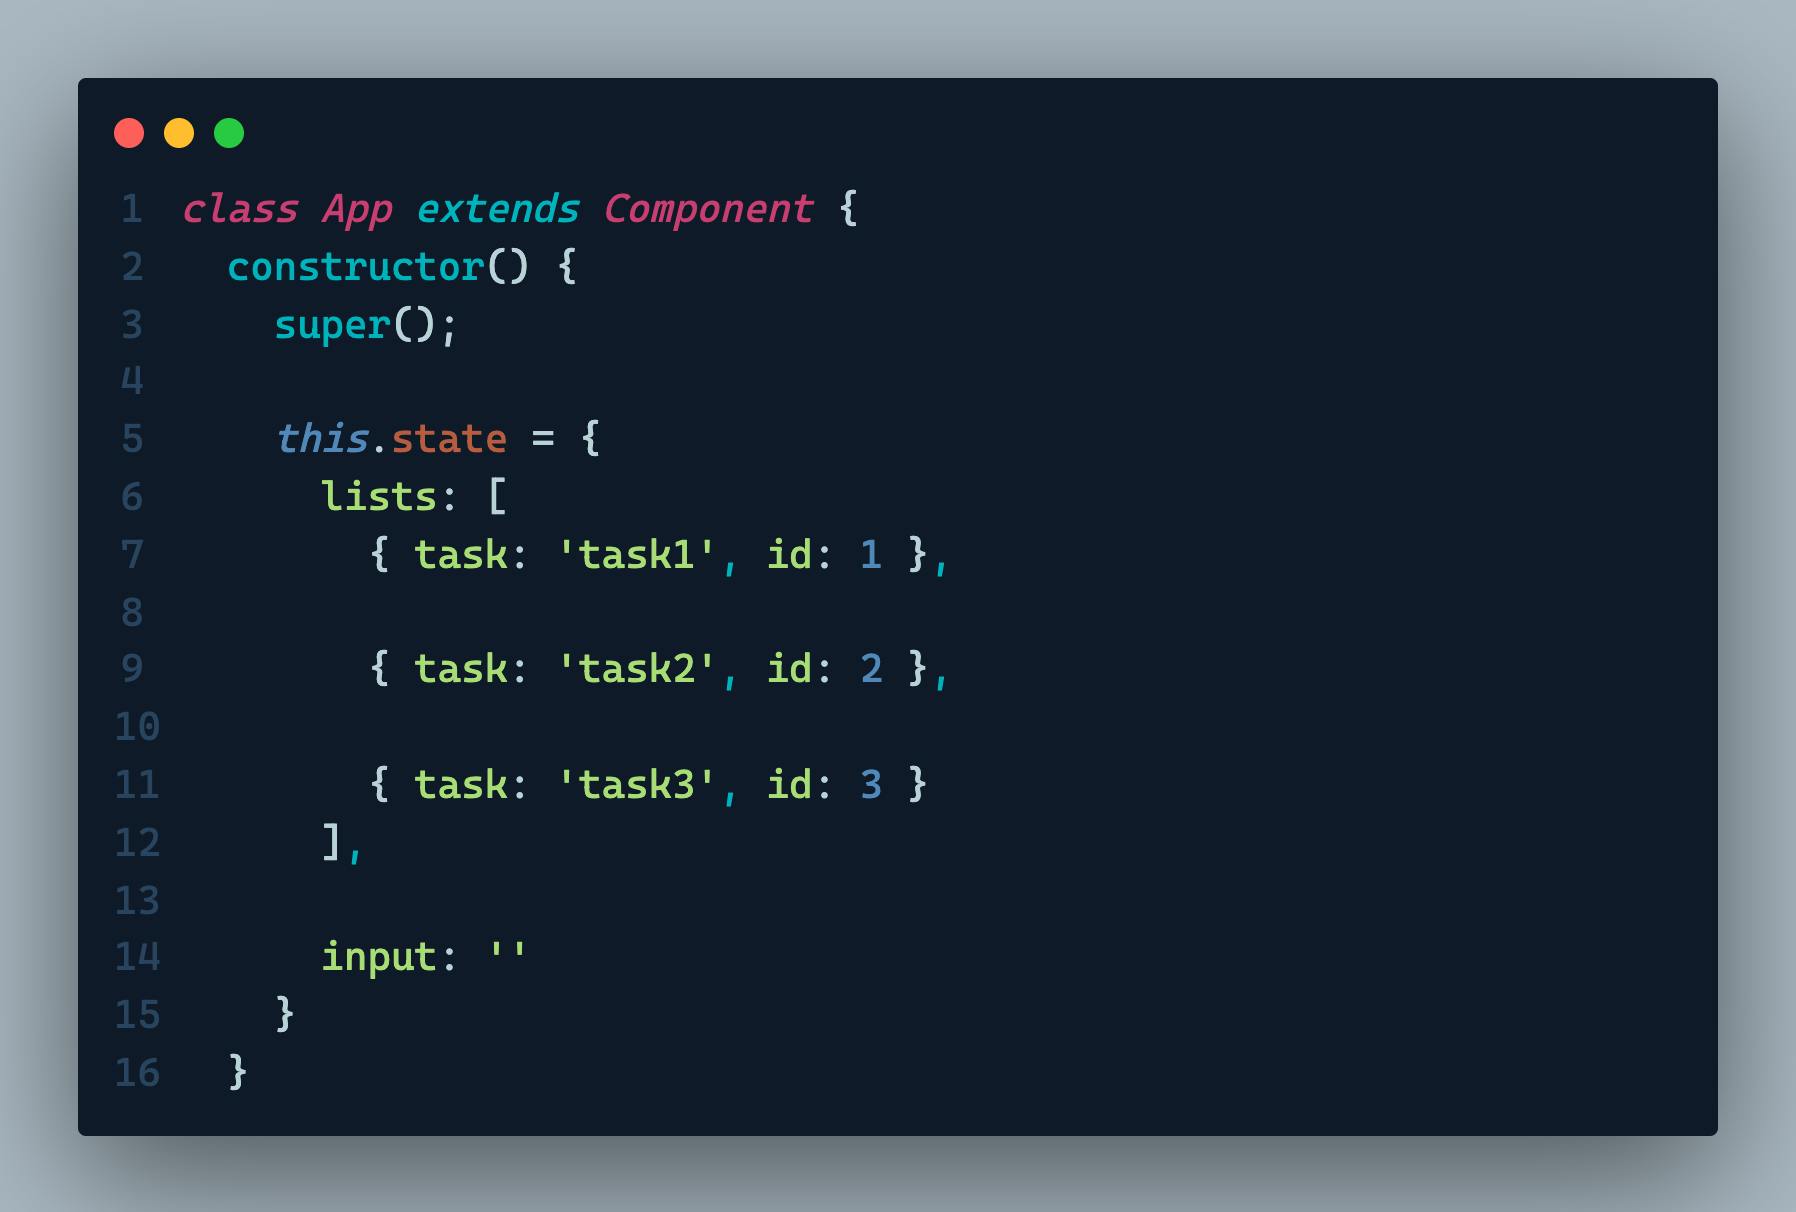
After this, we start writing our App class components which would extend the Component class of React and have access to its methods (by calling super()). This gives us access to a state property which we can declare what we want to change.
In the case of our app, what we want to change is our tasks (lists) property, with object values containing each task and its respective id.
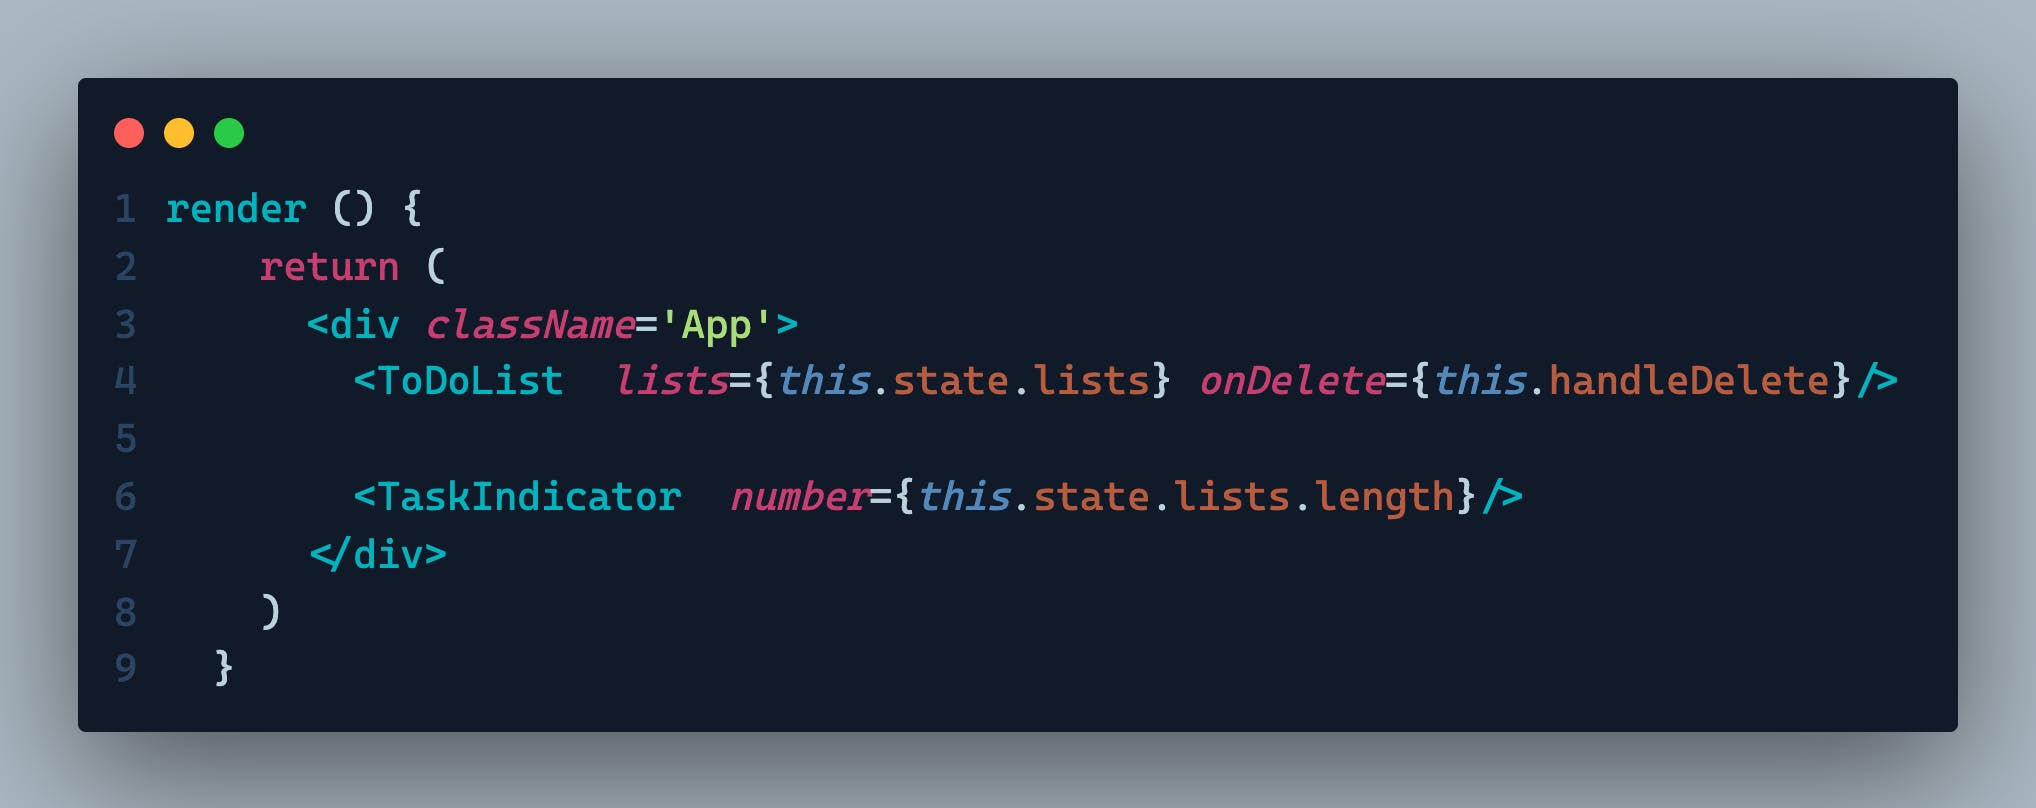
The render method is then called, which would return the components we want to in HTML-like format (JSX). We render first, the TaskIndicator component, which we pass the number props into, indicating the number of tasks left in our to-do list.
Let’s see how our TaskIndicator component will look like:
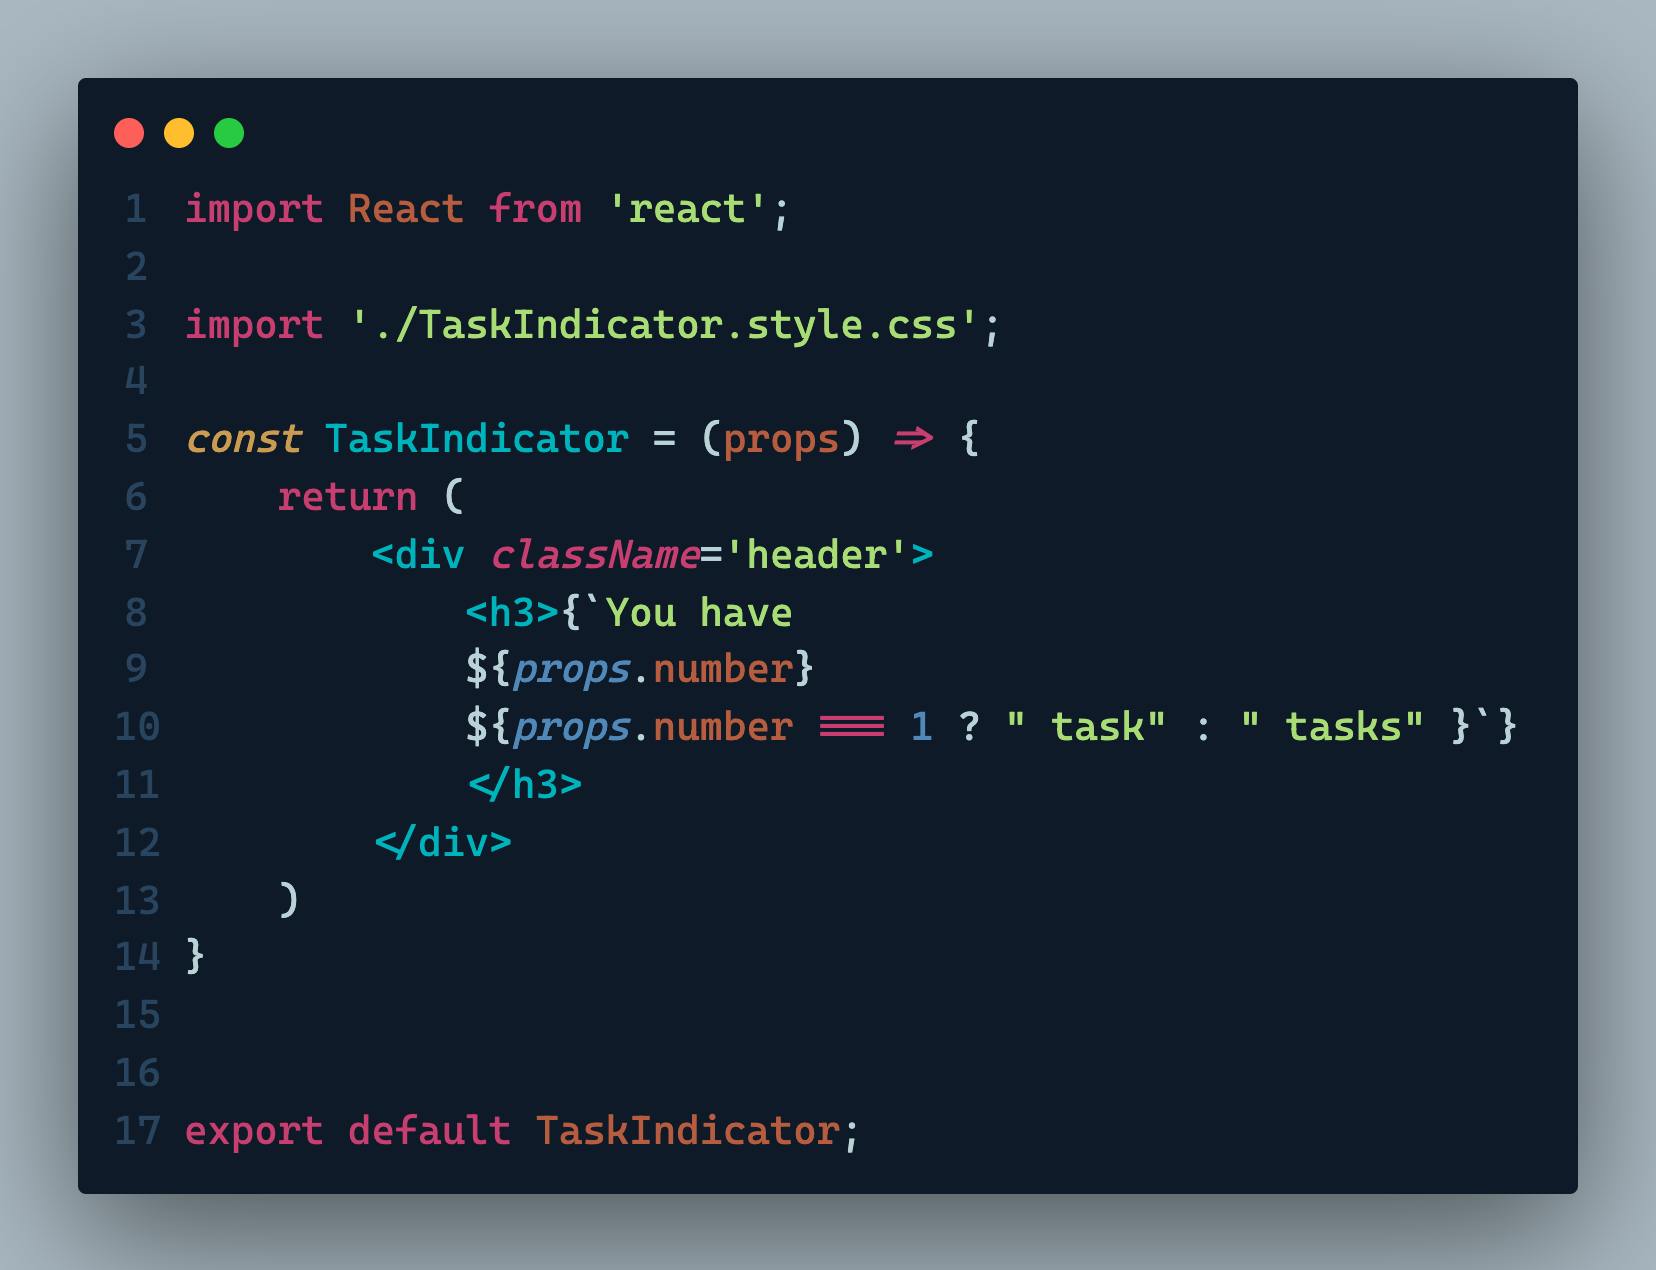
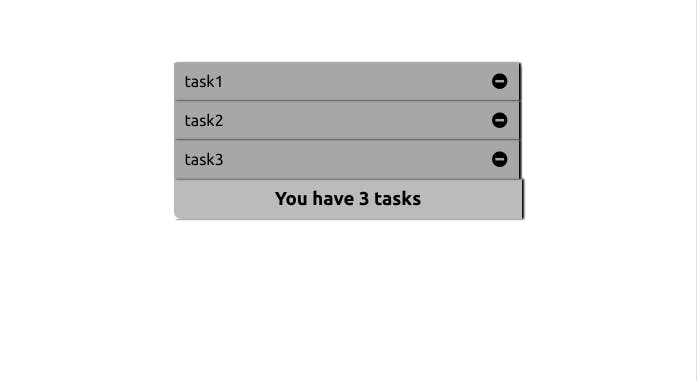
We make it a functional component(since it doesn't contain any state) that just returns a text with the number of tasks we have (using the number props we passed to it). After applying the components CSS file, we should see this in our browser:
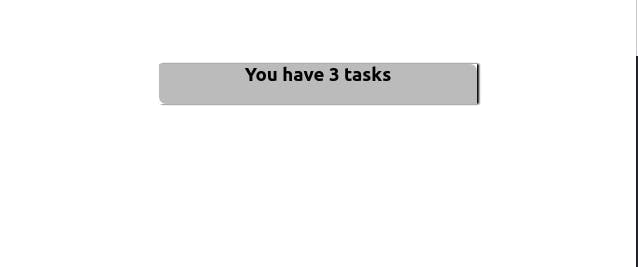
As you can see, it indicates that we have 3 tasks which are the number of objects present in our lists array.
That was pretty easy, wasn’t it?! Now let’s move on to adding our ToDoList component which would take the lists array as its props, and also have a handleDelete method that would help delete any task we are done with. The handleDelete method is as follows:
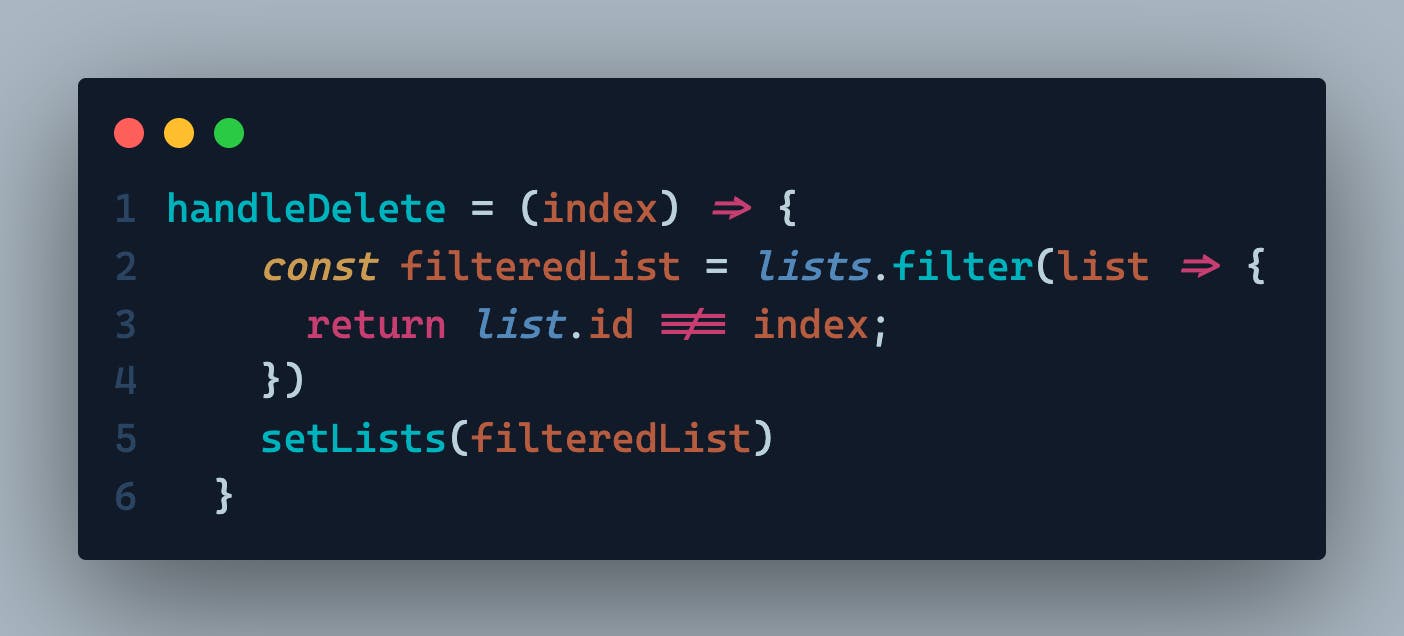
This method takes in an index argument that would help to filter out a task from the list with id not equal to the index. It then modifies the list's state to the filtered form using the this.setState() method.
We then add the ToDoList component to the render method of our App.js file:
Do not forget to import the ToDoList function from its file and then go on to write the ToDoList function:
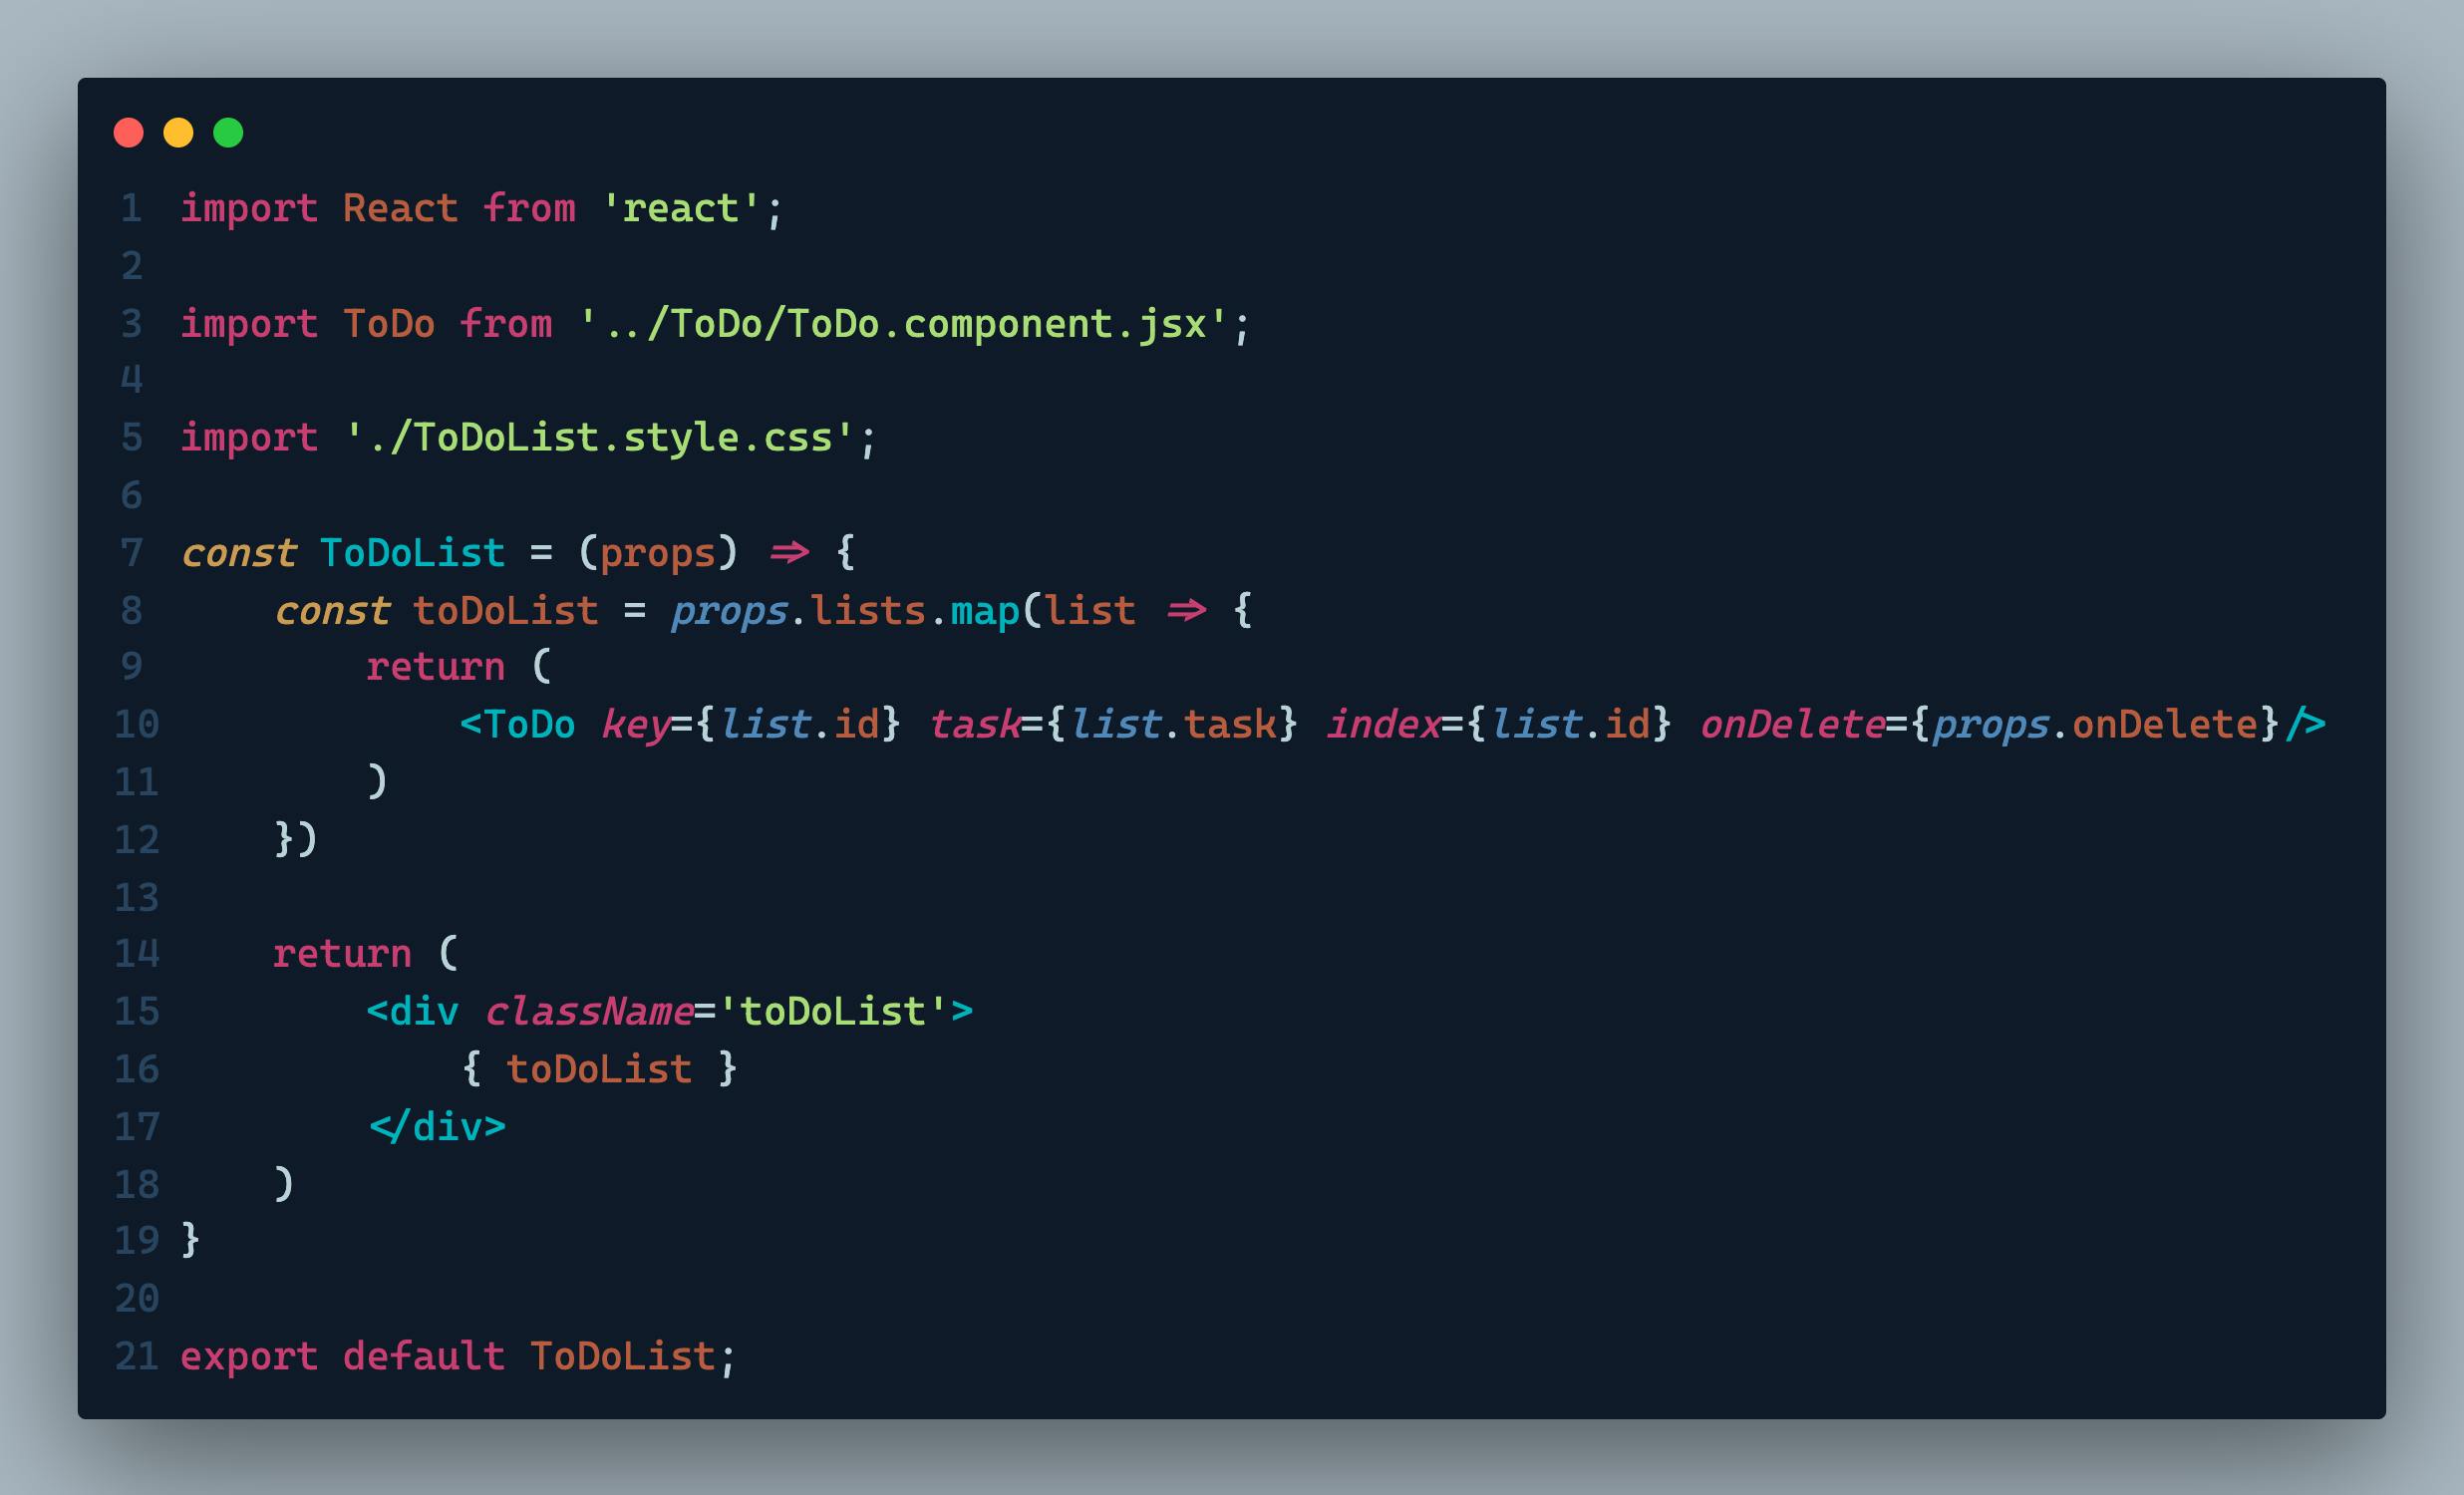
This functional component iterates through the lists array given as props, and returns a ToDo component for each list. We then give each ToDo component the following props:
key (equivalent to the id value in the list object)
index (same as key, but this is passed into the handleDelete method for removing each task.)
task (which represents each task of the lists array)
onDelete (this is the handleDelete method written in our App component.)
Of course, we import our ToDo component and write the function in our ToDo.component.jsx file:
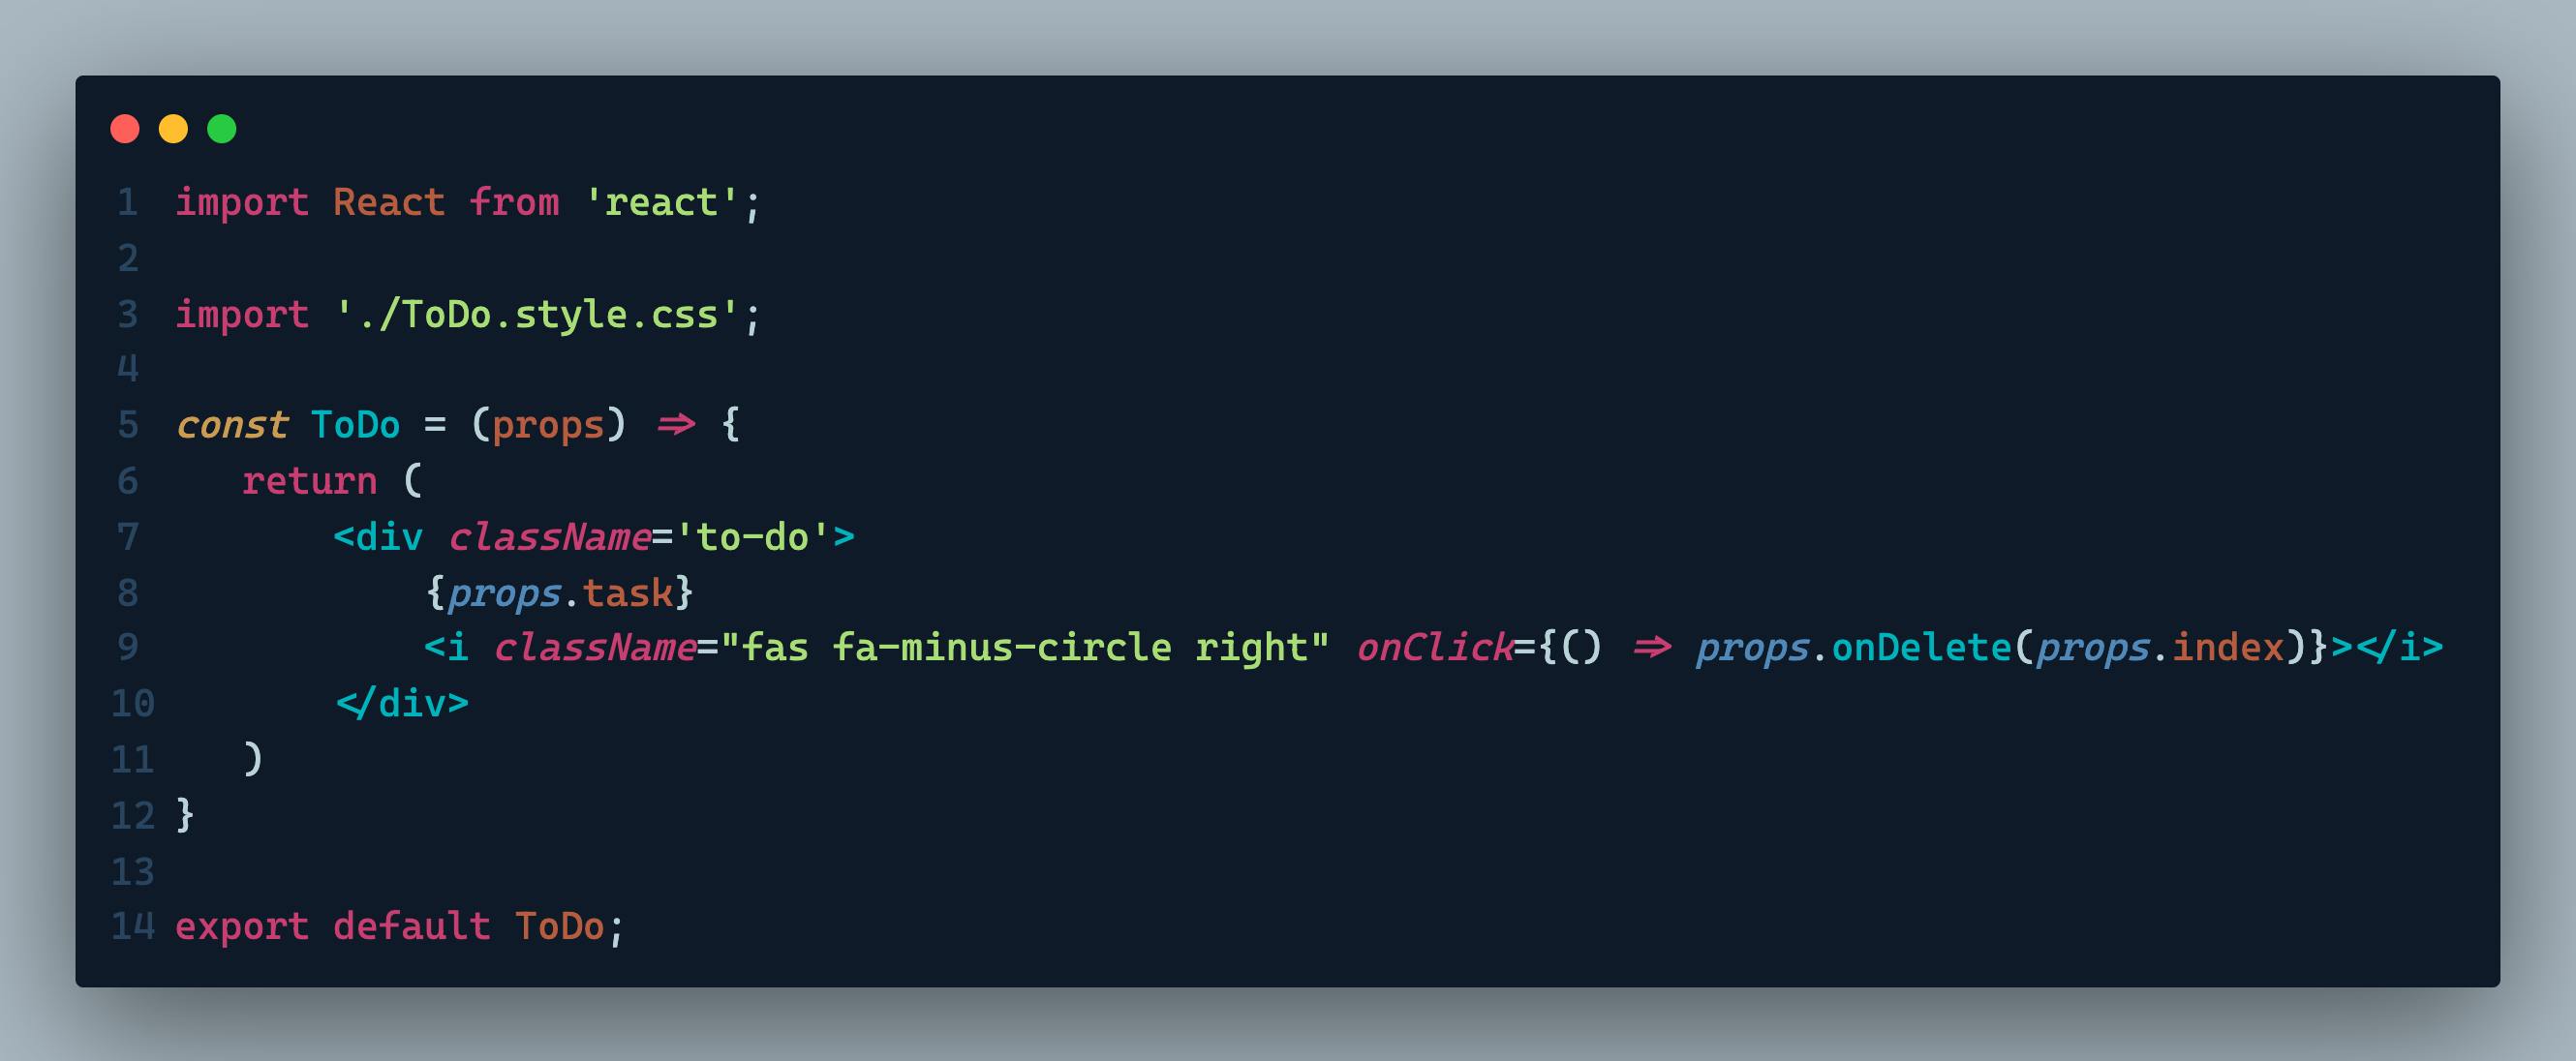
This part of our app finally returns a div with each task and a font awesome minus (-) icon that has the onDelete props passed to it. When this icon is clicked, the corresponding task is removed. The component is then exported.
To access the font awesome icon, we add the script tag below to the end of our body tag, in our index.html file which is located in the public folder of our app.
<script src="https://kit.fontawesome.com/8ca81c817e.js" crossorigin="anonymous"></script>
After all this, our app comes out looking like this:
The final stage of our app is creating the input form that would take in new tasks and add them to the list. From our sketch, this form would contain an input element (of type=’text’) and another font-awesome icon with the plus (+) sign.
To help us achieve this, we need the following methods:
a handleChange method that takes care of any value being passed as input
a handleSubmit method that adds the input (task) to the list as far as it is not empty.
First of all, we add an input state in our App component:
After which we proceed to write our handleChange and handleSubmit methods after the constructor.
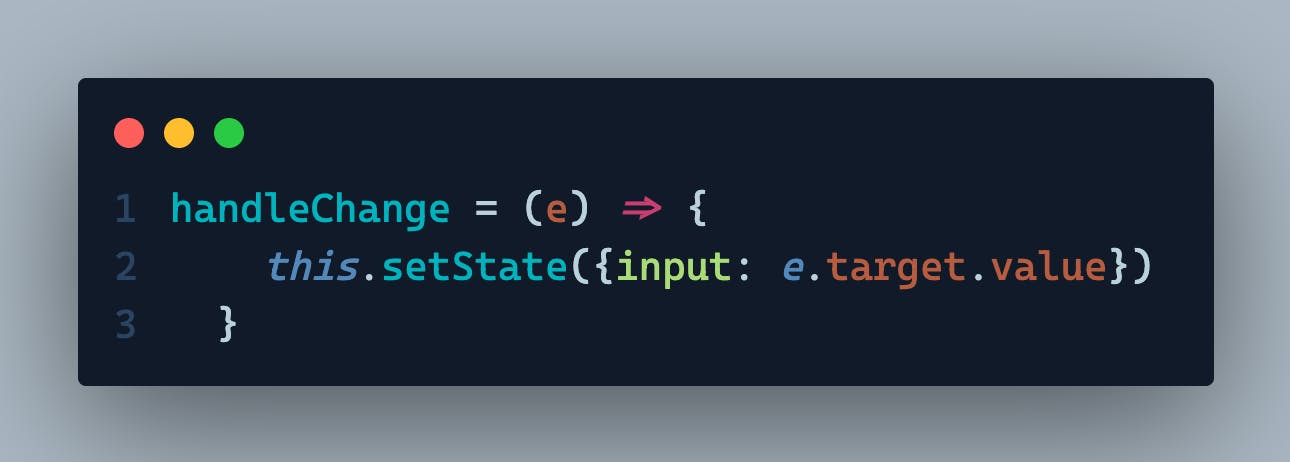
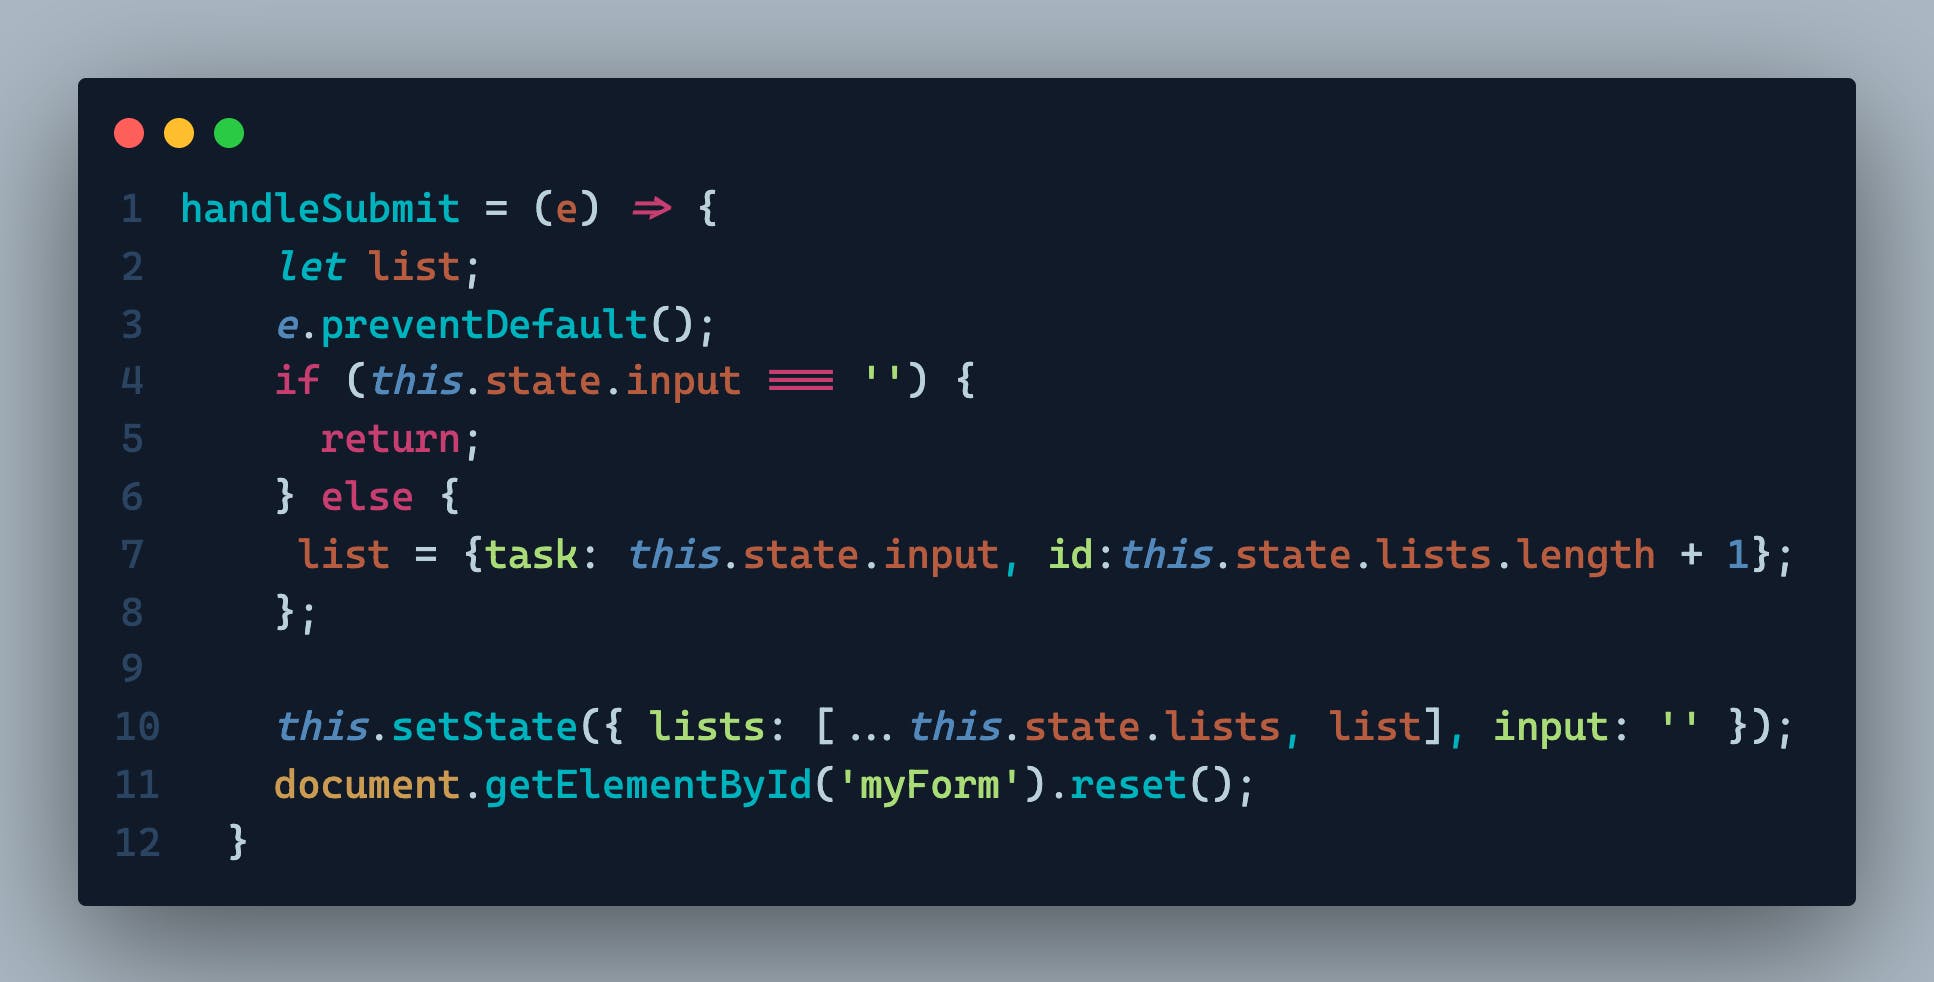
The handleChange method as mentioned earlier just takes note of what the user types and sets our input to that value.
Our handleSubmit method, on the other hand, does nothing if the user's input is empty. If the user eventually does write something, it creates an object with the task and id property and adds this object to our to-do list. When the task is added, the form is cleared or reset.
As we have done for the previous components, we import the InputForm component from its corresponding file and render it in our App component :
import InputForm from './components/InputForm/InputForm.component.jsx';
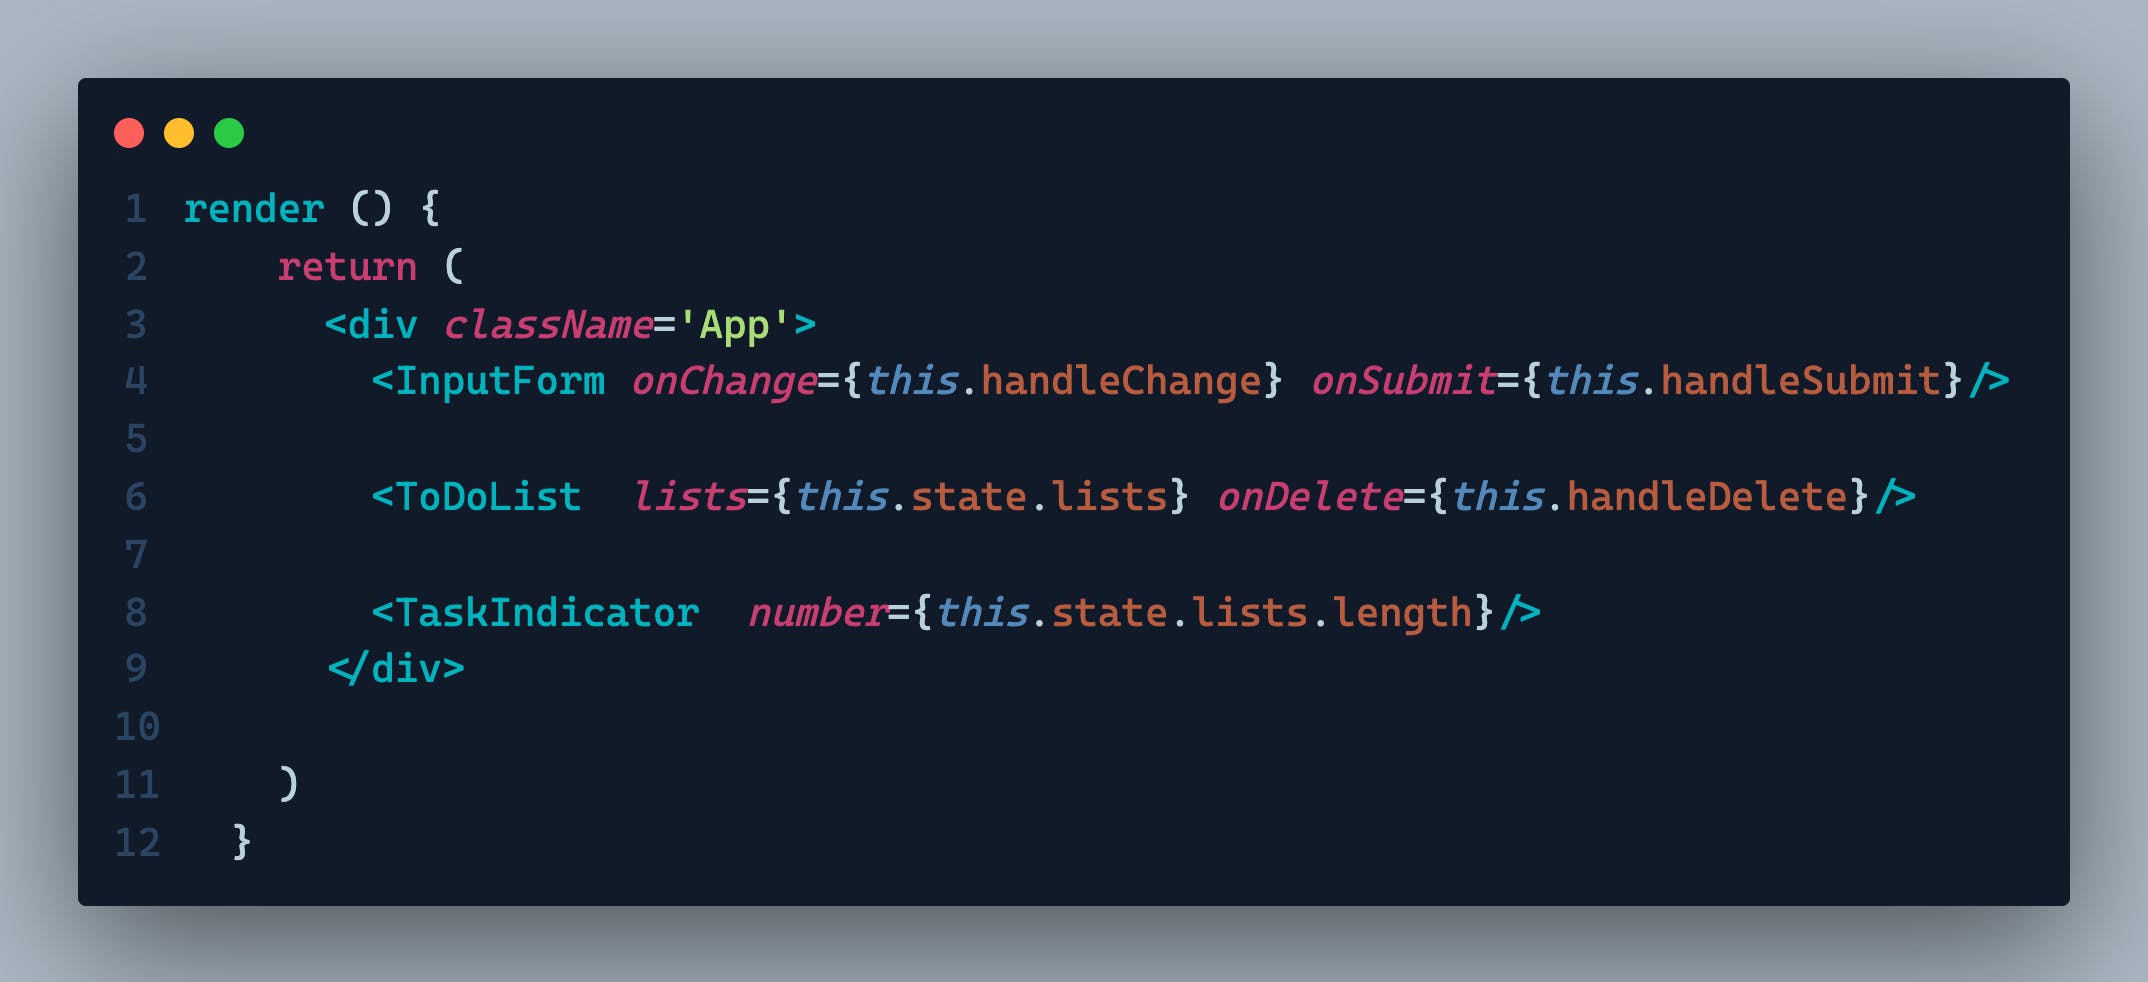
Remember that we have to pass in the two methods we just wrote, as props into the InputForm component.
Our InputForm component is shown below:
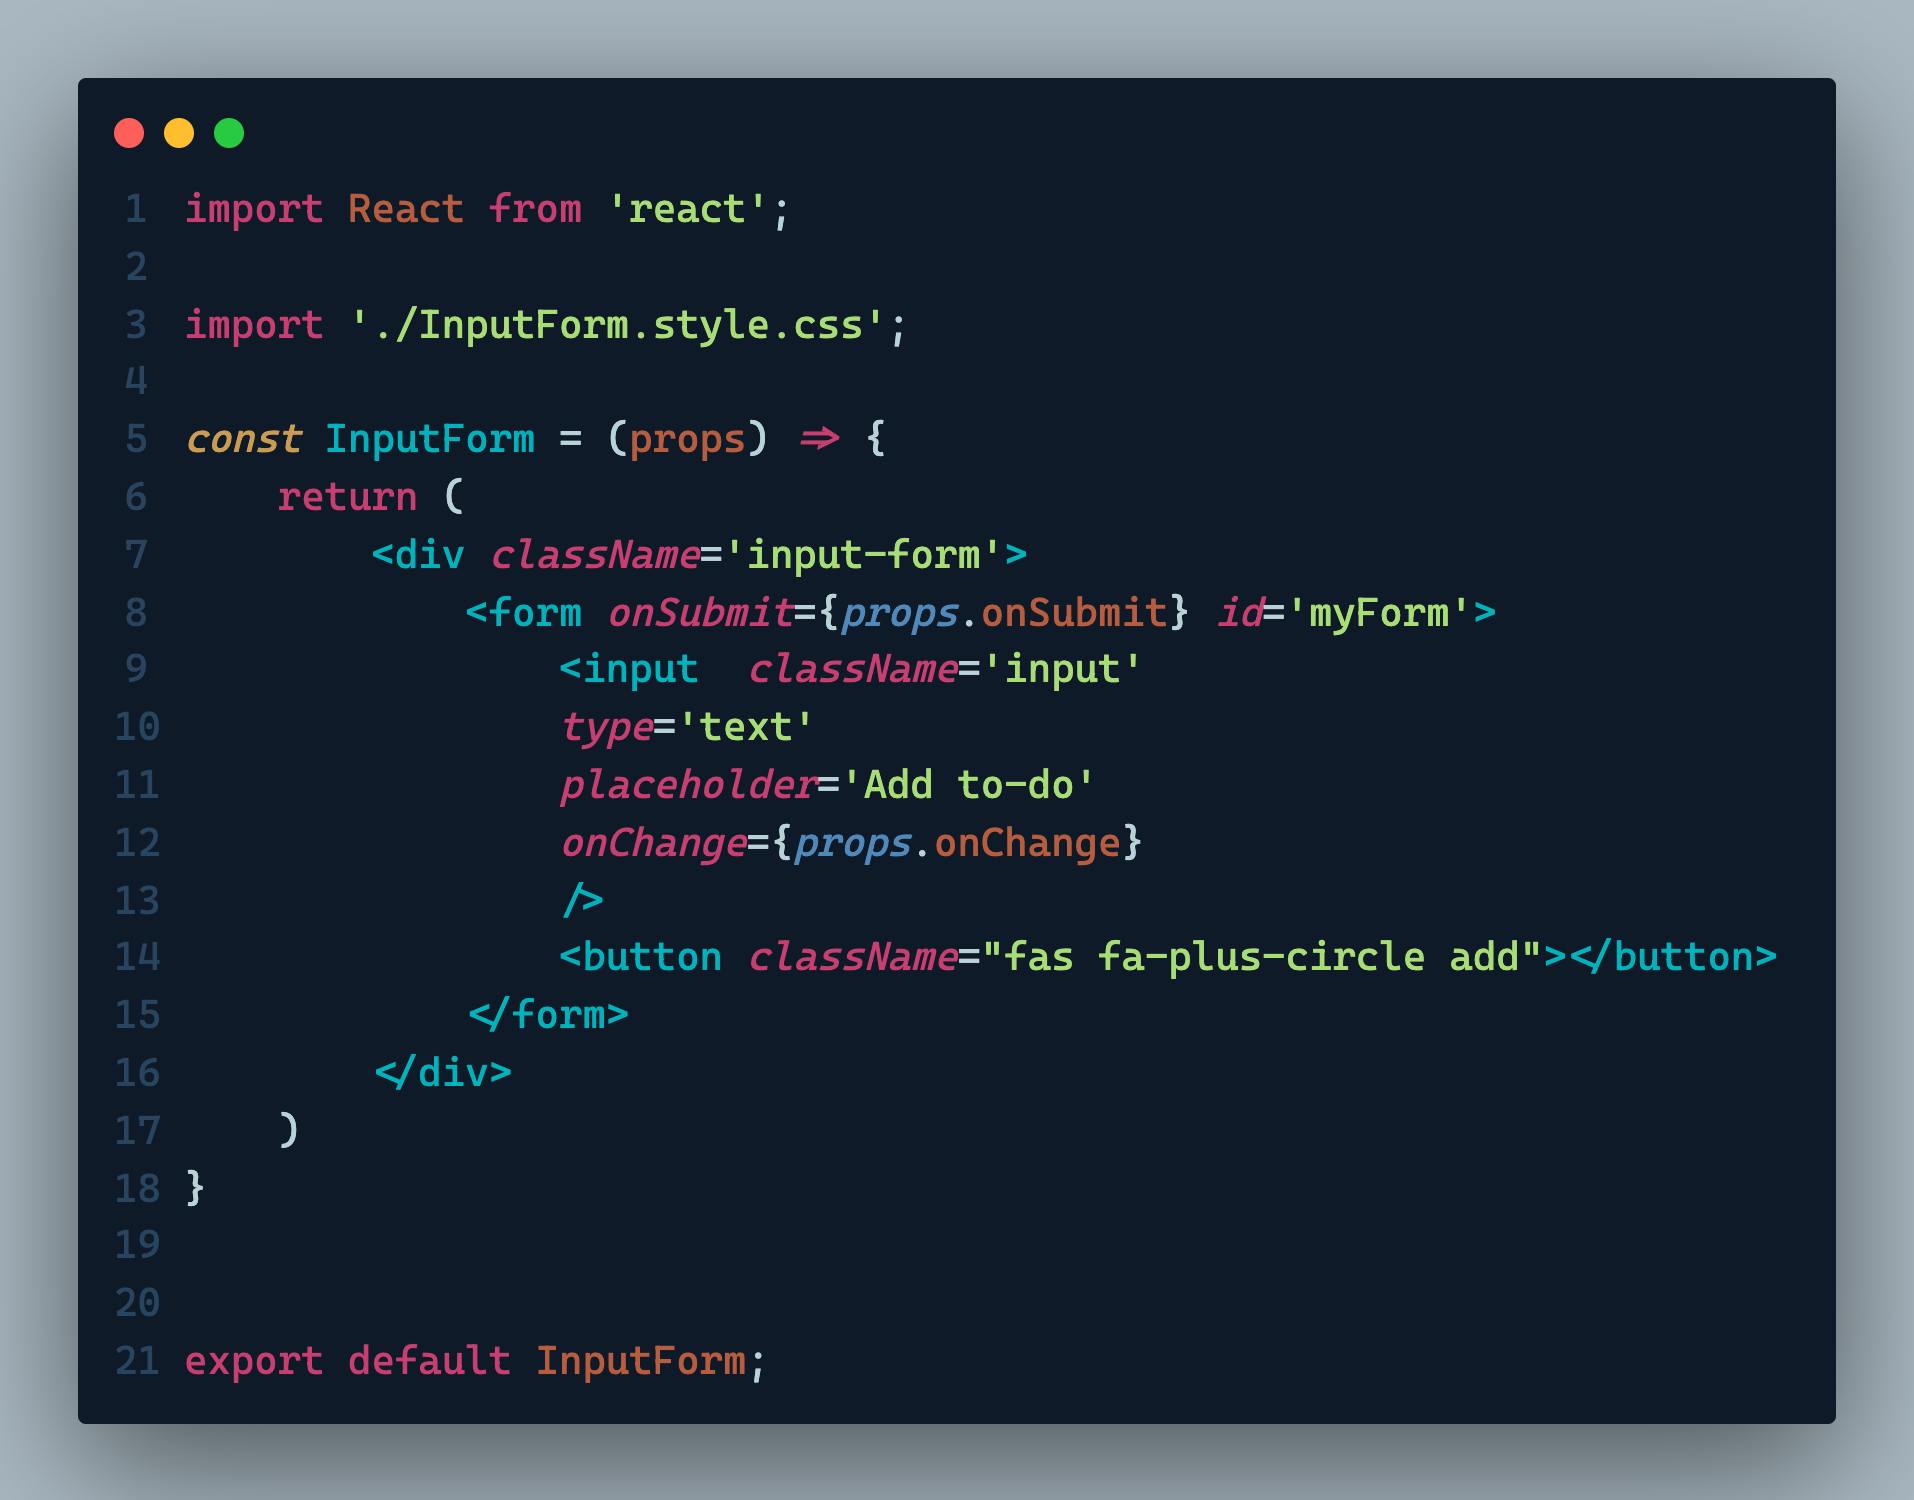
We make use of all necessary props and export our component.
Update - Functional Component For App
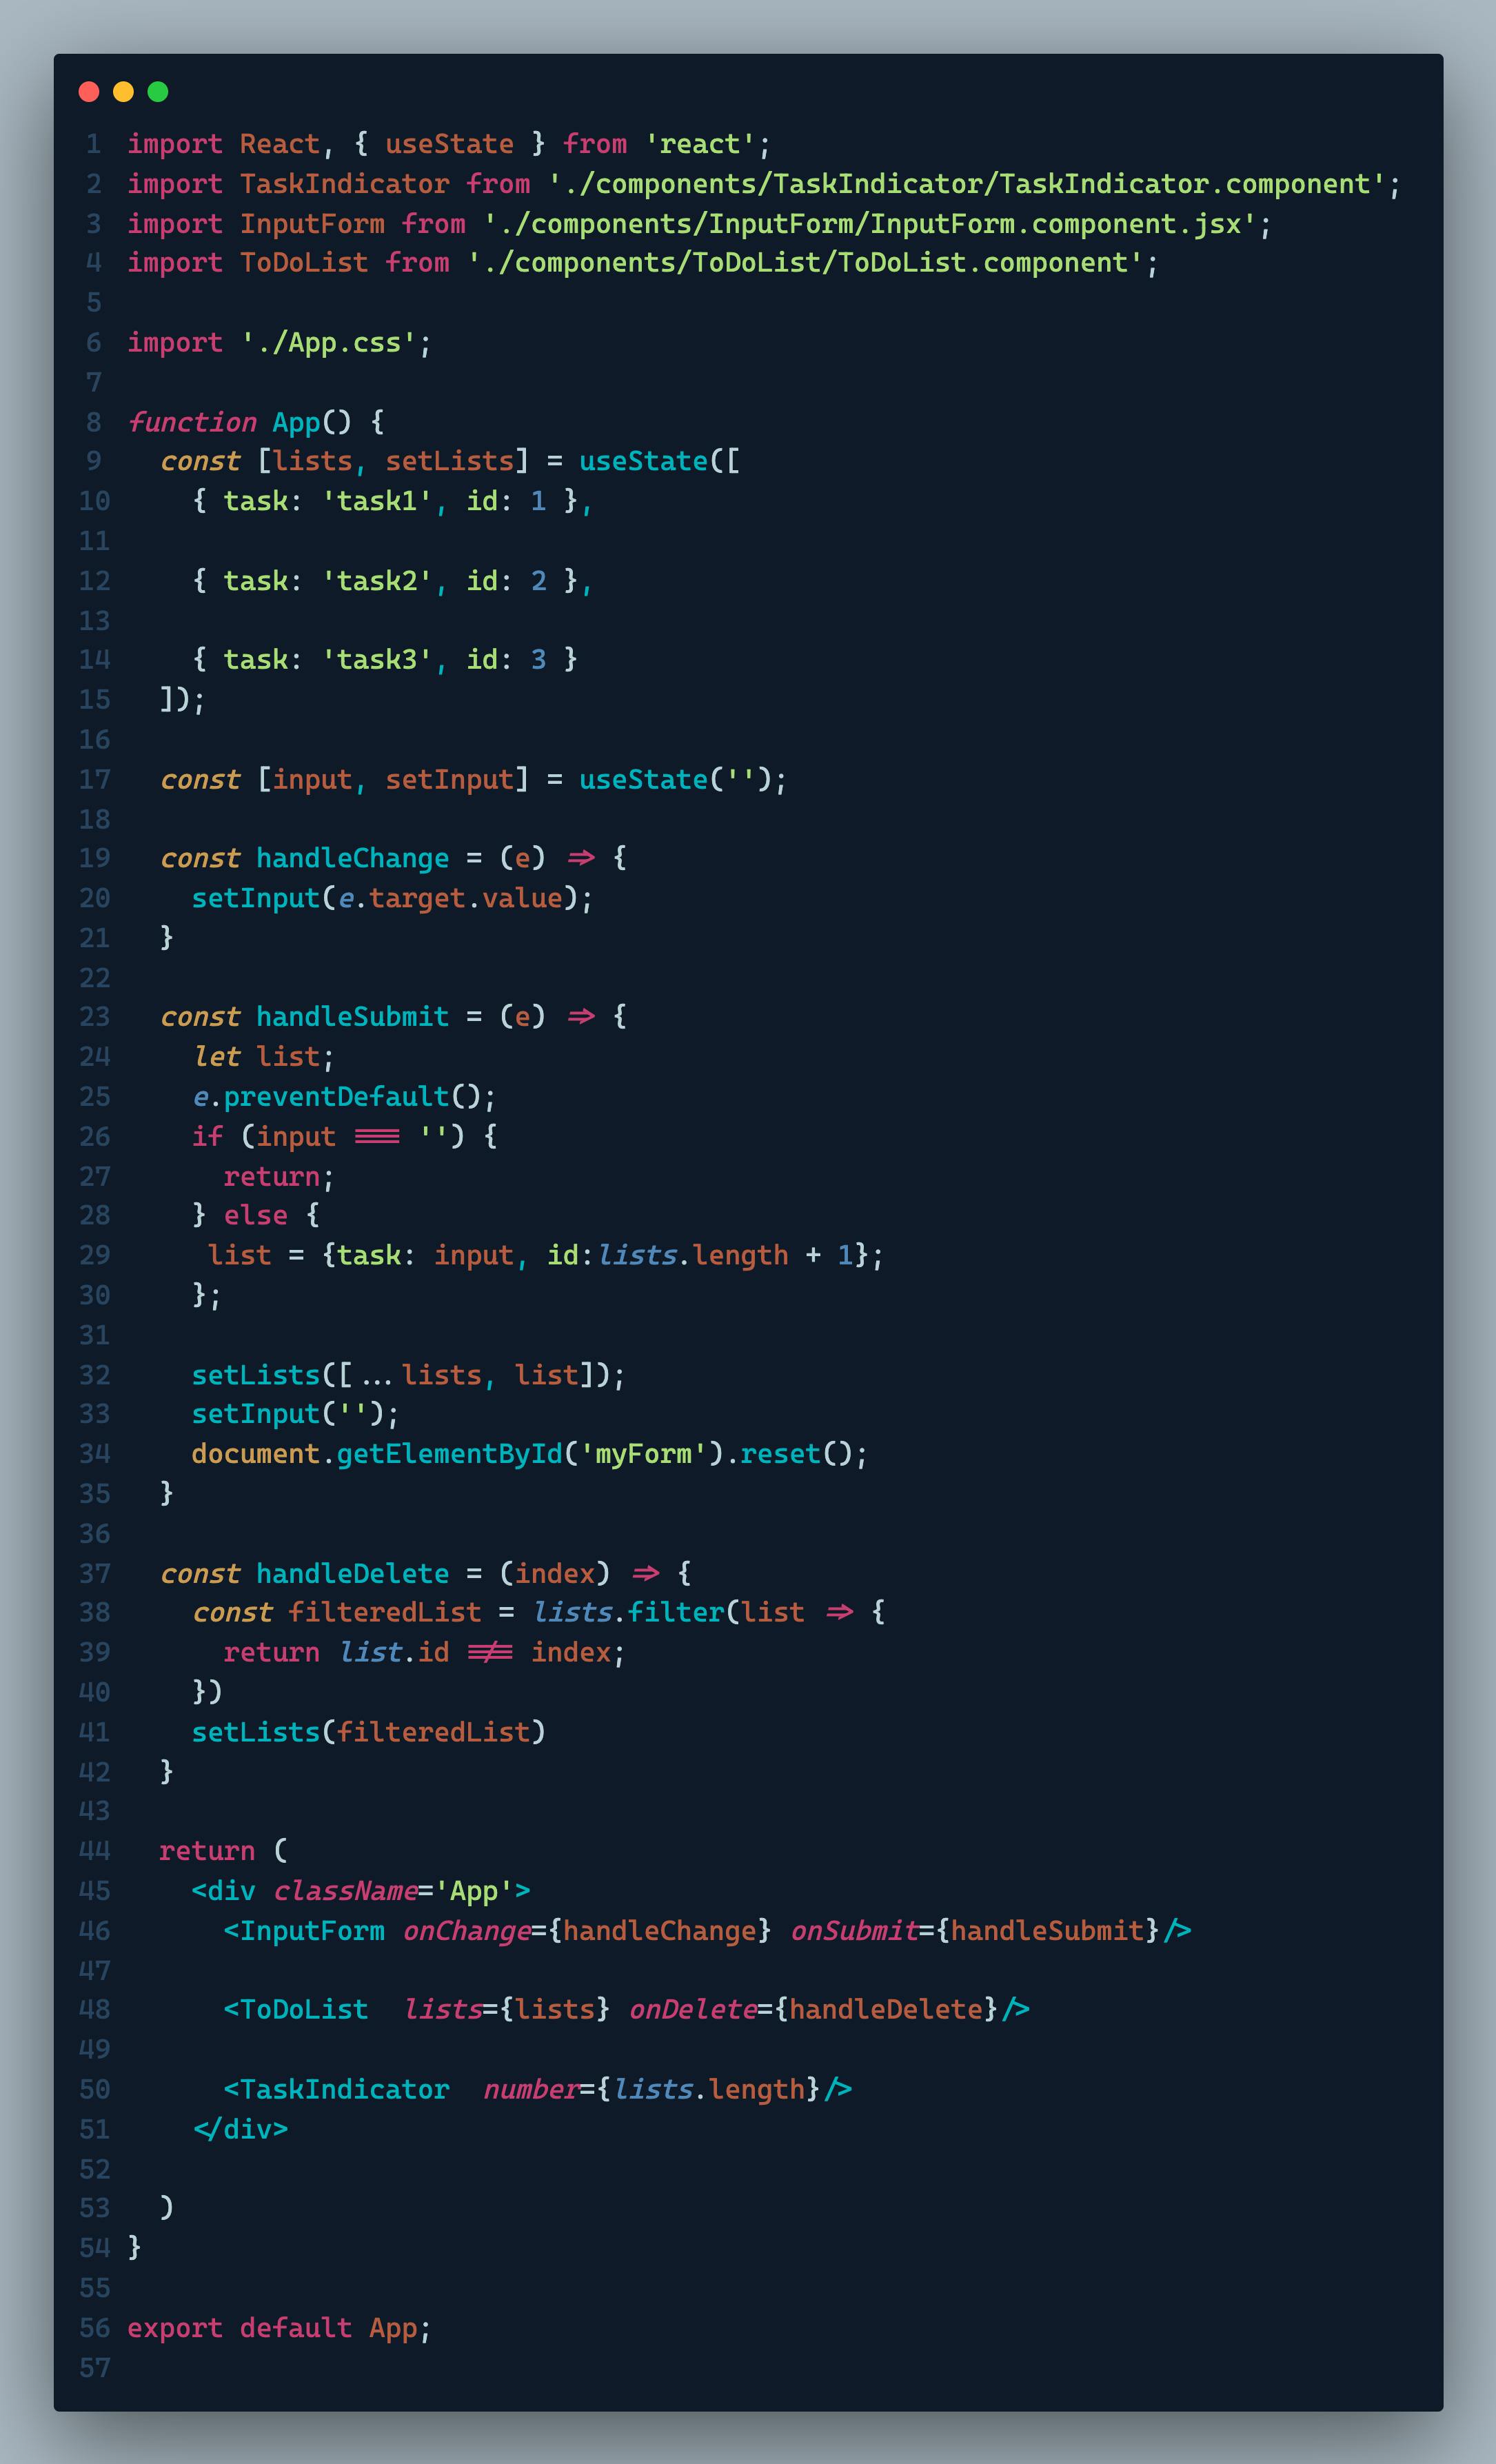
As you would notice, switching our App component from Class-based to functional-based comes with a few modifications.
The first and obvious thing we do is to change from a Class to function.
Doing this, we lose the this context; hence, we initialize all handle functions using const. We also no longer need the constructor, and can go on to remove it.
Lastly, we use the useState hook to initialize our state in place of this.state object in the constructor. useState allows you to initialize a state and also pass in a function to change the state later on - just like this.state and this.setState would. The difference is, it is used in conjunction with functional components and can be used as many times as possible to specify individual states just like we did for lists and input.
Every other thing is pretty much straightforward from here.
Conclusion
And that’s it!! We have our to-do list app ready. Just add the necessary styles and we have our app looking exactly like the finished product at the beginning.
Understanding a little project like this can help you grab some basic concepts in React and prepare you to learn more challenging concepts as you proceed.
If you liked this article, you could share and give it a thumbs up. Cheers!!